I am a Nick Bantock fan. Today I looked at his website for the first time. If you are unfamiliar with his work, check out his site.
I see he is selling some of the original works which appear in his books. The lowest price I saw was $500.
How great is it to be a professional artist, buying ephemera in antique stores and at auction, and, if one lives in America, that would be a tax-deductible work expense? Then to make the art, reproduce it into a book, make money from sales of the book plus then to sell some of the original art for $500 and up per piece?
I am having fun making ATCs. Too bad my work is not good enough for others to pay for it. I could get used to making art as my work. It is easier and less stressful than homeschooling and raising children, I can tell you that.
Wednesday, October 26, 2005


Monday, October 24, 2005
Books by Beth Cote on My Wish List
If I had the money I'd buy all of Beth Cote's books right now. Here is her website. I found the books on Amazon. There aren't enough Amazon customer reviews to help me figure out if these books are worth $20 each. (Amazon is not discounting them.) I wonder if these books are available at A.C. Moore so I could use the 40% off sale coupon on them? Hmmm.
I am beginning to feel restricted by the size of the ATCs so I think I may try my hand at altered books next.
Our library is having a hardcover book sale in November with all hardcover adult books at $1. Children's books are 25 cents to $1. I may go and be on the lookout for books I can alter.
I am beginning to feel restricted by the size of the ATCs so I think I may try my hand at altered books next.
Our library is having a hardcover book sale in November with all hardcover adult books at $1. Children's books are 25 cents to $1. I may go and be on the lookout for books I can alter.
Finished "Same Background" ATC Swap
I finished making the five ATCs for the "Same Background" swap on Saturday afternoon. The backgrounds were made by the swap hostess and were yellow and a deep red color, with a marbleized paint effect.
The afternoon started out with plans to sew Halloween costumes for both of my sons. I was intimidated by the project so I phoned my mother to make arrangements for her to help me with it on Sunday afternoon. Then I sat down to create ATCs.
My husband was busy watching the Notre Dame football game so he was busy and happy. The kids joined in and made a couple of ATCs then they went off to play with LEGOs.
I had worked on this swap twice already and had creative block. This time the blocks were gone. I had fun making the ATCs. I plan to post them soon.
It was nice to have the free time to do the artwork on the front of the cards as well as have the time to make the backs, glue them on, prepare the ATCs for mailing and gather some ephemera and other gifts for the hostess. I gave her some antique ribbon which I found stored in a box that my grandmother had packed away in 1950. I also gave her four background cards for ATCs that I made last week with watercolor paint on watercolor paper. I then weighed the package, checked the postage calculator on the Internet and put the postage on. Done, with a week before the deadline. It is nice to not rush for a deadline.
This morning the package goes in the mail. Hooray!
The afternoon started out with plans to sew Halloween costumes for both of my sons. I was intimidated by the project so I phoned my mother to make arrangements for her to help me with it on Sunday afternoon. Then I sat down to create ATCs.
My husband was busy watching the Notre Dame football game so he was busy and happy. The kids joined in and made a couple of ATCs then they went off to play with LEGOs.
I had worked on this swap twice already and had creative block. This time the blocks were gone. I had fun making the ATCs. I plan to post them soon.
It was nice to have the free time to do the artwork on the front of the cards as well as have the time to make the backs, glue them on, prepare the ATCs for mailing and gather some ephemera and other gifts for the hostess. I gave her some antique ribbon which I found stored in a box that my grandmother had packed away in 1950. I also gave her four background cards for ATCs that I made last week with watercolor paint on watercolor paper. I then weighed the package, checked the postage calculator on the Internet and put the postage on. Done, with a week before the deadline. It is nice to not rush for a deadline.
This morning the package goes in the mail. Hooray!
Thursday, October 20, 2005
Deli Wrap Transfer Technique
Here is something I found on the web, a beautiful looking piece can be created with deli sandwich wrap and paint! Here is a link to the technique and an illustration showing what it looks like.
This can be used for ATCs, collage, or for altered-anything.
I don’t know where I can get this non-waxy deli wrap but I may have to go hunting for it.
This can be used for ATCs, collage, or for altered-anything.
I don’t know where I can get this non-waxy deli wrap but I may have to go hunting for it.
Wednesday, October 19, 2005
Found Great Handmade Paper
I wrote this a few weeks ago. This was what got me hooked on the weekly trip to A.C. Moore with the 40% coupon in hand.
Three weeks ago, I was at a relative’s house, a relative who I know subscribes to the city’s newspaper. I knew that typically this newspaper carried a coupon to A.C. Moore (a large chain craft shop), on Wednesdays, for either 50% or 40% off any one item which is not on sale. I checked their paper and there was the 40% off coupon.
I had to go to the town that A.C. Moore is in anyway to fill my car’s tank with gas from Costco. So off I went.
I had planned to buy something for either lapbooking or for making ATCs or homemade cards. I wasn’t sure what I’d buy.
The first thing that I found was a “collage pack” of assorted papers. Most of the papers were about 4 inches square. The package was one pound. The regular price was $14.99 and it was on sale for $9.99. I could not use the coupon for this. I also was not finding a pack that had papers in colors that I felt I “must have”. There were way too many orange sheets and also many loud colors or weird patterns that are not my style. After much lamenting, I put them down and left them there.
I then noticed the big display of scrapbook papers and cardstock which were all on sale. I have a lot of cardstock already and didn’t need any more. But at this display was something I hadn’t seen before. It was an assortment package of handmade papers. The label says “Handmade paper by the pound” (no other brand name on it). The package was a 2 pound package. It stated that the sheet size was 4 ¼ inches x 11 inches. I like this size rather than the squares as with one sheet, I can get 4 backgrounds for ATCs. These papers also had botanicals and other interesting papers. The price was $9.99 (on sale), regularly ($12.99). I did the math and was confounded by the idea of paying $14.99 for one pound of the other papers versus $12.99 for double the amount of papers. This made no sense to me. I also noticed that with these 2 pound packs, there were groupings. One package was nearly all neutrals and botanicals, which I loved, so I bought that. Another package was a lot of dark colors or primary colors, and I bough that. I limited myself to two packages.
I still had the coupon to use. I wanted to buy some brads or decorative embellishments which I think are called eyelets. I have seen ATCs with brads and like them. I found a metallic assortment pack of tiny circle shaped brads and bought that, for $2.99. But this was not good enough to use the 40% off coupon on so I kept searching.
I finally found a pack of metal embellishments. One of the designs was a train and my older son begged that I buy it. These embellishments are holiday or seasonal themed. The price was $19.99, and with the coupon, I paid $12.00 for this.
I needed the equipment to get them onto the paper. There were many to choose from and also a large kit for $40. I decided to not buy the tool this week, as I’d wait for the next 40% off coupon.
When I got home I made some ATC backgrounds by gluing the handmade papers onto cardboard from food containers (cereal boxes, etc.).
My son got into the ATCs and made a dozen of them using the handmade papers for the backgrounds and using cut out images of LEGOs and Star Wars items, from catalogs that we receive in the mail.
Three weeks ago, I was at a relative’s house, a relative who I know subscribes to the city’s newspaper. I knew that typically this newspaper carried a coupon to A.C. Moore (a large chain craft shop), on Wednesdays, for either 50% or 40% off any one item which is not on sale. I checked their paper and there was the 40% off coupon.
I had to go to the town that A.C. Moore is in anyway to fill my car’s tank with gas from Costco. So off I went.
I had planned to buy something for either lapbooking or for making ATCs or homemade cards. I wasn’t sure what I’d buy.
The first thing that I found was a “collage pack” of assorted papers. Most of the papers were about 4 inches square. The package was one pound. The regular price was $14.99 and it was on sale for $9.99. I could not use the coupon for this. I also was not finding a pack that had papers in colors that I felt I “must have”. There were way too many orange sheets and also many loud colors or weird patterns that are not my style. After much lamenting, I put them down and left them there.
I then noticed the big display of scrapbook papers and cardstock which were all on sale. I have a lot of cardstock already and didn’t need any more. But at this display was something I hadn’t seen before. It was an assortment package of handmade papers. The label says “Handmade paper by the pound” (no other brand name on it). The package was a 2 pound package. It stated that the sheet size was 4 ¼ inches x 11 inches. I like this size rather than the squares as with one sheet, I can get 4 backgrounds for ATCs. These papers also had botanicals and other interesting papers. The price was $9.99 (on sale), regularly ($12.99). I did the math and was confounded by the idea of paying $14.99 for one pound of the other papers versus $12.99 for double the amount of papers. This made no sense to me. I also noticed that with these 2 pound packs, there were groupings. One package was nearly all neutrals and botanicals, which I loved, so I bought that. Another package was a lot of dark colors or primary colors, and I bough that. I limited myself to two packages.
I still had the coupon to use. I wanted to buy some brads or decorative embellishments which I think are called eyelets. I have seen ATCs with brads and like them. I found a metallic assortment pack of tiny circle shaped brads and bought that, for $2.99. But this was not good enough to use the 40% off coupon on so I kept searching.
I finally found a pack of metal embellishments. One of the designs was a train and my older son begged that I buy it. These embellishments are holiday or seasonal themed. The price was $19.99, and with the coupon, I paid $12.00 for this.
I needed the equipment to get them onto the paper. There were many to choose from and also a large kit for $40. I decided to not buy the tool this week, as I’d wait for the next 40% off coupon.
When I got home I made some ATC backgrounds by gluing the handmade papers onto cardboard from food containers (cereal boxes, etc.).
My son got into the ATCs and made a dozen of them using the handmade papers for the backgrounds and using cut out images of LEGOs and Star Wars items, from catalogs that we receive in the mail.
Monday, October 17, 2005
Stamp Shaped Die Cutter on My Wish List
The AC Moore 40% coupon thing has me in there all the time now. I went today to buy cardstock for 6 cents per sheet in colors that didn’t come in my multi-pack set, and also bought the die cutter thing to make corners rounded—both (with the 40% off coupon) can be used for ATCs and for gift card making.
But I found something else I want: die cutter in the shape of a square stamp. I was thinking that it could cut the outer shape in white paper then either hand cut, or if they a have a square one the right size, I could make my own (non postage) stamps for use on ATCs with whatever designs I see in magazines or with my own painted images or whatever (glue colored square onto white background so it looks like a postage stamp). The possibilities are endless, aren’t they?
I put off buying it until the next 40% off coupon sale. LOL. If I don’t stop going in there I may take up scrapbooking…LOL. (I have avoided scrapbooking as I was afraid I’d go nuts and want to own everything!)
But I found something else I want: die cutter in the shape of a square stamp. I was thinking that it could cut the outer shape in white paper then either hand cut, or if they a have a square one the right size, I could make my own (non postage) stamps for use on ATCs with whatever designs I see in magazines or with my own painted images or whatever (glue colored square onto white background so it looks like a postage stamp). The possibilities are endless, aren’t they?
I put off buying it until the next 40% off coupon sale. LOL. If I don’t stop going in there I may take up scrapbooking…LOL. (I have avoided scrapbooking as I was afraid I’d go nuts and want to own everything!)
Swap Lost in Mail and Behind on Posting Scans
I have been so busy lately that I haven't had time to post scans of my ATCs. I have scanned all that I made, and I scan all the ATCs before I send them out in the mail. However I just haven't had the time to dedicate to cropping the large scans and making a new document with just that scan then uploading it to my blog. Sorry!
I am also upset because on Saturday I learned that the last swap I participated in seems to be lost in the mail. It has been eight mail-days (9 calendar days) and the swap still hasn't made the 1500 or so mile journey to its destination. I am really disappointed in this as I worked really hard on these. I tried a new technique for me, packing tape transfers. I also did my first embellishments with metallic eyelet decorations. The swap was for the "Seven Wonders of the World". I used 'Cinderella' stamps (stamps which are not postage stamps) from 1974, which were part of my childhood stamp collection. I placed the stamp on a background of a coordinating colored piece of handmade (store bought) paper. I then found text on the internet about that Wonder and copied it into a Word document. I then edited the text a bit so as to not plagiarize. I then changed the font size and font style to make it look nicer. I printed that off on my laser printer then did a packing tape transfer. I added this to the ATC. Then I added postage stamps to each one (most from the 1950s). These stamps were a gift from a former neighbor. They were given to me when I was about 10 years old; she gave me her entire childhood stamp collection, which she put together in the 1940s and 1950s. (Who knows, some may be valuable!)
So all that work was for naught. The swap hostess held up the swap waiting for at least, my ATCs to arrive. I won't be getting ATCs back as part of the swap.
I am so disappointed in it that I decided to hold off on signing up for any other swaps for the time being. I also am dealing with family health issues and that takes energy away from me and is a blocker of creative energy.
Halloween is around the corner so my most urgent project is to teach myself to sew so I can sew costumes for my two children. Wish me luck.
I am also upset because on Saturday I learned that the last swap I participated in seems to be lost in the mail. It has been eight mail-days (9 calendar days) and the swap still hasn't made the 1500 or so mile journey to its destination. I am really disappointed in this as I worked really hard on these. I tried a new technique for me, packing tape transfers. I also did my first embellishments with metallic eyelet decorations. The swap was for the "Seven Wonders of the World". I used 'Cinderella' stamps (stamps which are not postage stamps) from 1974, which were part of my childhood stamp collection. I placed the stamp on a background of a coordinating colored piece of handmade (store bought) paper. I then found text on the internet about that Wonder and copied it into a Word document. I then edited the text a bit so as to not plagiarize. I then changed the font size and font style to make it look nicer. I printed that off on my laser printer then did a packing tape transfer. I added this to the ATC. Then I added postage stamps to each one (most from the 1950s). These stamps were a gift from a former neighbor. They were given to me when I was about 10 years old; she gave me her entire childhood stamp collection, which she put together in the 1940s and 1950s. (Who knows, some may be valuable!)
So all that work was for naught. The swap hostess held up the swap waiting for at least, my ATCs to arrive. I won't be getting ATCs back as part of the swap.
I am so disappointed in it that I decided to hold off on signing up for any other swaps for the time being. I also am dealing with family health issues and that takes energy away from me and is a blocker of creative energy.
Halloween is around the corner so my most urgent project is to teach myself to sew so I can sew costumes for my two children. Wish me luck.
Monday, October 10, 2005
Thoughts on book "Collage and Construction" by Harvey Weiss
I have been reading a book titled "Collage and Construction" by Harvey Weiss. It was published in 1970 and is one in the series called, "Beginning Artist's Library".
Weiss states that with collage often the artist does not begin a project with an end product in mind. Instead, the artist uses different materials and lets the materials "tell" the artist what to do with it.
I loved the description of where the artist finds the materials that he uses.
The author goes on to say that what a collage artist needs most is imagination.
Unlike other books I have read, this author describes collage as having one of three different categories. Collage is either realistic, (such as a collage composing the image of a face or a landscape), a design (not a picture of anyone or anything, it doesn't tell a story), or an image that evokes an emotion.
We are encouraged straight away to begin collecting papers and items to use in our collages. Keeping an eye out for anything that interests us, we can soon collect quite a number of materials to use in our collages. The author also urges us to collect various objects found in nature, such as seeds, dried grasses, etc.
Texture collages are collages which are made from three dimensional objects or with objects that are thick or have a unique texture. The artist encourages the use of PVA glue (i.e. Elmer's brand white glue), diluted with water. When working with bulky materials, the glue should be painted onto stiff paper or some other strong, hard surface, with a paintbrush, then the objects can be applied to it (rather than trying to paint each item and then lay it onto the dry paper). Some examples of collages shows are dried bean collage, fabric, sand, grains, and seeds.
Constructions are three dimensional objects made such as a sculpture. Some of the examples shown in the book use strong paper (such as tag or oak board) to make creations that look a bit like tree houses or contemporary houses with ladders going up to the doors for entry. Some of these creations are then decorated on the sides with collage images or are enhanced with items such as egg cartons for a roof!
The next topic is boxes, making shadow boxes as pieces of art. Directions to make a simple box out of wood are given. The box can then be lined at the back and also at the sides. The exterior of the box can also be collaged, including all sides and the back. Three-dimensional objects are then inserted and permanently installed inside the box. Items are either screwed in or glued in. The blue must be a strong type in order to hold the heavier items. The artist explains his thought process behind one of his creations.
Making stained-glass window like decorations out of paper is also covered in this book. These are simple creations, drawn and cut out of black paper, and then tissue paper is glued onto the back. When the light shines through, they look like stained glass windows.
Some other examples of constructions are what I would call sculptures, made out of a range of silly objects. These finished pieces of art are strange and whimsical. Again the photographs are so silly that no one would be intimidated by them. My husband's comment to these was that they look like bunches of trash glued together!
The last type of construction that is covered is the use of line as the form. Wire sculptures are shown (which do look too difficult for most adults). Three dimensional structures made out of sticks are shown. Nails inserted on flat wooden surfaces, then strung with string make patterns and shapes that are interesting.
In concluding, the author states on page 62:
All that is needed to know to begin making a collage and a construction is covered in this book. All of the illustrations are black and white photographs, which is disappointing (yet typical of the time that it was published). The items shown are mostly odd or simple looking. Some look as if they could have been made by a preschool aged child--so don't worry of feeling intimidated by this book! The language of the book is simple enough to be read and understood by a middle-school aged child, or even read aloud to an elementary-school aged child.
This book definitely inspired me. I now know what to do with the drawers of the old desk that we were going to throw away--use them as shadow boxes. I also am anxious to work with my children to make three dimensional paper houses and structures.
(P.S. My friends want to know when I find the time to blog. I wrote this while at a public library while one of my sons was taking part in a homeschoolers book discussion group last week. I composed it online on Blogger and saved it as a draft. Today I had time to proofread and edit it while at home.)
Weiss states that with collage often the artist does not begin a project with an end product in mind. Instead, the artist uses different materials and lets the materials "tell" the artist what to do with it.
I loved the description of where the artist finds the materials that he uses.
"The collage artist doesn't usually go out looking for specific things. He is more likely to clip photographs and pictures he finds interesting, or he will wander about picking and choosing odds and ends--bits of wood or metal, scraps of cloth, twigs, paper, pebbles--out of the rubble and junk that can be found everywhere." (page 8)
The author goes on to say that what a collage artist needs most is imagination.
Unlike other books I have read, this author describes collage as having one of three different categories. Collage is either realistic, (such as a collage composing the image of a face or a landscape), a design (not a picture of anyone or anything, it doesn't tell a story), or an image that evokes an emotion.
"One of the most interesting things about collage is its ability to take common, ordinary pictures to produce an entirely new and uncommon image." (page 13)
We are encouraged straight away to begin collecting papers and items to use in our collages. Keeping an eye out for anything that interests us, we can soon collect quite a number of materials to use in our collages. The author also urges us to collect various objects found in nature, such as seeds, dried grasses, etc.
Texture collages are collages which are made from three dimensional objects or with objects that are thick or have a unique texture. The artist encourages the use of PVA glue (i.e. Elmer's brand white glue), diluted with water. When working with bulky materials, the glue should be painted onto stiff paper or some other strong, hard surface, with a paintbrush, then the objects can be applied to it (rather than trying to paint each item and then lay it onto the dry paper). Some examples of collages shows are dried bean collage, fabric, sand, grains, and seeds.
Constructions are three dimensional objects made such as a sculpture. Some of the examples shown in the book use strong paper (such as tag or oak board) to make creations that look a bit like tree houses or contemporary houses with ladders going up to the doors for entry. Some of these creations are then decorated on the sides with collage images or are enhanced with items such as egg cartons for a roof!
The next topic is boxes, making shadow boxes as pieces of art. Directions to make a simple box out of wood are given. The box can then be lined at the back and also at the sides. The exterior of the box can also be collaged, including all sides and the back. Three-dimensional objects are then inserted and permanently installed inside the box. Items are either screwed in or glued in. The blue must be a strong type in order to hold the heavier items. The artist explains his thought process behind one of his creations.
Making stained-glass window like decorations out of paper is also covered in this book. These are simple creations, drawn and cut out of black paper, and then tissue paper is glued onto the back. When the light shines through, they look like stained glass windows.
Some other examples of constructions are what I would call sculptures, made out of a range of silly objects. These finished pieces of art are strange and whimsical. Again the photographs are so silly that no one would be intimidated by them. My husband's comment to these was that they look like bunches of trash glued together!
The last type of construction that is covered is the use of line as the form. Wire sculptures are shown (which do look too difficult for most adults). Three dimensional structures made out of sticks are shown. Nails inserted on flat wooden surfaces, then strung with string make patterns and shapes that are interesting.
In concluding, the author states on page 62:
"What you need is confidence if your own ideas, judgments, and imagination. If you decide you would like to try out something, then you must go ahead and try it. If you like what you are making that is reason enough for making it. If you feel that work is not successful--try to figure out where it went wrong--and the next time you'll do better. And if your work does turn out well, that is reason enough to experiment with different materials and new ways of making collages and constructions".
All that is needed to know to begin making a collage and a construction is covered in this book. All of the illustrations are black and white photographs, which is disappointing (yet typical of the time that it was published). The items shown are mostly odd or simple looking. Some look as if they could have been made by a preschool aged child--so don't worry of feeling intimidated by this book! The language of the book is simple enough to be read and understood by a middle-school aged child, or even read aloud to an elementary-school aged child.
This book definitely inspired me. I now know what to do with the drawers of the old desk that we were going to throw away--use them as shadow boxes. I also am anxious to work with my children to make three dimensional paper houses and structures.
(P.S. My friends want to know when I find the time to blog. I wrote this while at a public library while one of my sons was taking part in a homeschoolers book discussion group last week. I composed it online on Blogger and saved it as a draft. Today I had time to proofread and edit it while at home.)
Sunday, October 09, 2005
Great Tag Sale Find for ATC Storage
Today I was driving down the road and I noticed a church harvest festival. I noticed up in the back, what looked like a tag sale. The festival had recently ended and they were cleaning up, but I went in for a look. I was hoping to find some old board games for inexpensive prices, that I could use pieces of for making ATCs.
What I did find was an old, aged, wooden, plain recipe holder box, for 3x5 inch recipe cards. It was marked $1. I was thrilled. Sticking out of it was an envelope and I didn't even look inside of it. I assumed they were blank recipe index cards. When I got home I realized they were clear plastic sleeves. These are perfect for use to protect ATCs while in storage or when mailing them.
Now I can take my ATCs out of the zip top plastic baggie!
YIPPEE!
Simple pleasures...it doesn't take much to make me happy.
Oh, and I did find one child's dinosaur game (for 25 cents) which, if it is a dud to play with, I may recycle the parts to make ATCs with.
What I did find was an old, aged, wooden, plain recipe holder box, for 3x5 inch recipe cards. It was marked $1. I was thrilled. Sticking out of it was an envelope and I didn't even look inside of it. I assumed they were blank recipe index cards. When I got home I realized they were clear plastic sleeves. These are perfect for use to protect ATCs while in storage or when mailing them.
Now I can take my ATCs out of the zip top plastic baggie!
YIPPEE!
Simple pleasures...it doesn't take much to make me happy.
Oh, and I did find one child's dinosaur game (for 25 cents) which, if it is a dud to play with, I may recycle the parts to make ATCs with.
Wednesday, October 05, 2005
All Confused!
I have been too busy lately to do ATCs. I have been out of the house a lot and rushing from here to there.
A few days ago I sat down to work on a swap for "Seven Wonders of the World", which is the next swap that I have due. I began working on backgrounds, then had to abruptly leave the house (leaving the kitchen table completely a mess).
The next day I received an interesting random act of kindness (RAK) in the mail. It was an ATC made with the meaning of my first name as the theme. The artist asked that if I wanted to, could I send her back one with the meaning of her name? I decided to do this and began working on that. I didn't finish. I cleaned off the table so we could eat at the table (what a concept).
When I went back to it the following day, I somehow got confused about what swap was due. I left the unfinished name ATC and began working on a "Vintage Circus" swap, thinking it was due in just a couple of days.
Then, I have been busy and not home again, and today rushed to finish up the "Vintage Circus" swap. When I went online to find the snail mail address to send the ATCs to I realized that swap is not due for another 14 days!!
I then wondered what swap was due shortly. I checked my records and rediscovered it is the "Seven Wonders" swap. It is due in three days. Now I have to get moving on that swap!!
This is an indication that I am too busy! I am getting all confused!
I also am over-stressed and really do need the time to do something fun for myself.
Okay, off to get cracking on this swap...
A few days ago I sat down to work on a swap for "Seven Wonders of the World", which is the next swap that I have due. I began working on backgrounds, then had to abruptly leave the house (leaving the kitchen table completely a mess).
The next day I received an interesting random act of kindness (RAK) in the mail. It was an ATC made with the meaning of my first name as the theme. The artist asked that if I wanted to, could I send her back one with the meaning of her name? I decided to do this and began working on that. I didn't finish. I cleaned off the table so we could eat at the table (what a concept).
When I went back to it the following day, I somehow got confused about what swap was due. I left the unfinished name ATC and began working on a "Vintage Circus" swap, thinking it was due in just a couple of days.
Then, I have been busy and not home again, and today rushed to finish up the "Vintage Circus" swap. When I went online to find the snail mail address to send the ATCs to I realized that swap is not due for another 14 days!!
I then wondered what swap was due shortly. I checked my records and rediscovered it is the "Seven Wonders" swap. It is due in three days. Now I have to get moving on that swap!!
This is an indication that I am too busy! I am getting all confused!
I also am over-stressed and really do need the time to do something fun for myself.
Okay, off to get cracking on this swap...
Friday, September 30, 2005
Typogenerator--Fun!
While reading a blog written by someone who makes ATCs, I learned of this fun website. (Sorry, I forgot to write down the blog name!)
I found out about this fun and cool (and free) website:
www.typogenerator.net.
This is fun to play with if you have time to spare.
You type in a word then run the program. It searches google images site for images linked to that word, and it uses text found for that word also. It uses a computer program to scramble the images and words and changes the colors, for a collage effect. You never know what will turn up. You can do more than one try for each keyword if you want or ask it to make a new image over and over with the same background, etc.
I played with this a few weeks ago. I saved some of my favorites to my hard drive by using the mouse's right button to click on the image and following the usual procedure for saving a document.
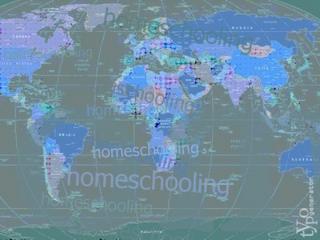 With homeschooling the world is the classsroom
I loved that with the (just the) keyword "Homeschooling" a map image came up. This made me think "with homeschooling the world is the classroom".
Anyway, it is inspiring for those of us who like to get some ideas for collage-making.
I found out about this fun and cool (and free) website:
www.typogenerator.net.
This is fun to play with if you have time to spare.
You type in a word then run the program. It searches google images site for images linked to that word, and it uses text found for that word also. It uses a computer program to scramble the images and words and changes the colors, for a collage effect. You never know what will turn up. You can do more than one try for each keyword if you want or ask it to make a new image over and over with the same background, etc.
I played with this a few weeks ago. I saved some of my favorites to my hard drive by using the mouse's right button to click on the image and following the usual procedure for saving a document.
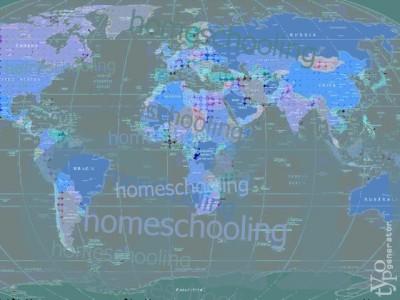 With homeschooling the world is the classsroom
I loved that with the (just the) keyword "Homeschooling" a map image came up. This made me think "with homeschooling the world is the classroom".
Anyway, it is inspiring for those of us who like to get some ideas for collage-making.
Wednesday, September 28, 2005
Made Some "Produce" ATCs on Saturday and Sunday
Last Saturday we had a busy morning going to a typical country fair in New England. I decided to spend some time relaxing and making some ATCs for a swap I am participating in about "produce" and the harvest.
I also spent time on Sunday afternoon making more "produce" ATCs.
I decided to use an old seed catalog that I had actually saved since 2003. Please note that I had recycled the 2004 and 2005 catalogs in the name of trying not to be a packrat. I don't know how the 2003 catalog was saved but I was happy about it. This catalog is excellent for decoupage and ATCs. It is from a seed company called Shumway's. All of the illustrations are done in the old fashioned ink style hand drawsings. Some of the illustrations are in color and are on glossy paper. Most of the catalog is on newsprint with black line illustrations. The images are gorgeous and are for vegetables, fruits, and herbs. If you want this catalog I am sure you can sign up to receive one, on their website. My catalog usually arrives the week after Christmas. I only receive one per year.
I made various collage ATCs using cutouts from the Shumway's catalog. Each page has a nearly-life sized tie photograph on it. I also used an old Hermes tie catalog that I saved to use in collage artwork with my children.
I made my first hand drawn ATC by trying to copy an illustration from the seed company. It was with black pen on a white background. I decided to spruce it up with colored crayons.
For the first time I used mini rubber stamps for letters to spell words. I also was inspired by the way I clean my rubber stamps, to randomly stamp blank ATC background cards with the used stamps until the ink was all gone. This made an interesting effect.
I colored in one black and white image with my favorite colored pencils (Berol Prismacolor).
Some of the ATCs I loved while others were mediocre. I had to make nine for this swap. Somehow I lost track and actually made 12.
I will post photos when I have time.
I also spent time on Sunday afternoon making more "produce" ATCs.
I decided to use an old seed catalog that I had actually saved since 2003. Please note that I had recycled the 2004 and 2005 catalogs in the name of trying not to be a packrat. I don't know how the 2003 catalog was saved but I was happy about it. This catalog is excellent for decoupage and ATCs. It is from a seed company called Shumway's. All of the illustrations are done in the old fashioned ink style hand drawsings. Some of the illustrations are in color and are on glossy paper. Most of the catalog is on newsprint with black line illustrations. The images are gorgeous and are for vegetables, fruits, and herbs. If you want this catalog I am sure you can sign up to receive one, on their website. My catalog usually arrives the week after Christmas. I only receive one per year.
I made various collage ATCs using cutouts from the Shumway's catalog. Each page has a nearly-life sized tie photograph on it. I also used an old Hermes tie catalog that I saved to use in collage artwork with my children.
I made my first hand drawn ATC by trying to copy an illustration from the seed company. It was with black pen on a white background. I decided to spruce it up with colored crayons.
For the first time I used mini rubber stamps for letters to spell words. I also was inspired by the way I clean my rubber stamps, to randomly stamp blank ATC background cards with the used stamps until the ink was all gone. This made an interesting effect.
I colored in one black and white image with my favorite colored pencils (Berol Prismacolor).
Some of the ATCs I loved while others were mediocre. I had to make nine for this swap. Somehow I lost track and actually made 12.
I will post photos when I have time.
Stayed Up Late Making ATCs
The other night I had a meeting in my home. I was then wide awake (and happy) and decided that rather than go watch TV in bed or read a book, I'd take advantage of the alone time and make some ATCs for a swap.
The swap is called, "Vintage, Pen, Paper and Ink" and requires the use of vintage papers such as receipts, lists and letters.
I am using old papers from my great-grandmother, grandmother and my grandfather. I made collages out of the papers.
I was not happy with some of the ones that I had made for this swap, previously. The problem is that I was using a lot of old lists (on white paper) and on old cash register receipts. Therefore the collages had either a lot of white or a lot of yellowing old paper color (read: boring).
I decided to try and spice up some of the old ones.
On one card I used acrylic paint mixed with water to make the paint more transparent. I painted over some of the white papers. I didn't think this looked very good or interesting. Oh well.
On another card I colored different segments with chalk pastels. I then used water on a paintbrush on top of that to make the color more deep. It looks very much like paint.
I then went to my box of papers and began looking at bunches of receipts and lists from the 1970s. I was thinking about how the papers were mostly white and boring. Then I noticed that some papers were colored. I had the idea to make a rainbow type of design.
I didn't have any red papers but I had about every other color of the rainbow plus pink. I layered the paper on a vertically positioned ATC and made stripes of rainbow colors. Due to the size of the ATC each layer was only about 1/2 inch high.
I liked that card so much that I made a second one.
I then had an idea to make a picture out of the papers. This idea came from looking at a green bank envelope and thinking it was the same color as a flower stem. I then selected a background card I made last month, with watercolor paints on watercolor paper. The color of the background was a dark pink. Using freehand scissor cutting I fashioned a stem and leaves. I chose a black color for the center of the daisy-shaped flower. I used a pale pink auto repair receipt from 1975 for petals. At first I tried drawing the petals and cutting them out but that was a pain in the neck so I just cut them freehand. I then glued down the papers and I loved the ATC so much that I decided to keep that one. By the time I finished that one it was nearly 1 in the morning and I was dead tired (or else I would have made a whole series of these flowers).
The swap is called, "Vintage, Pen, Paper and Ink" and requires the use of vintage papers such as receipts, lists and letters.
I am using old papers from my great-grandmother, grandmother and my grandfather. I made collages out of the papers.
I was not happy with some of the ones that I had made for this swap, previously. The problem is that I was using a lot of old lists (on white paper) and on old cash register receipts. Therefore the collages had either a lot of white or a lot of yellowing old paper color (read: boring).
I decided to try and spice up some of the old ones.
On one card I used acrylic paint mixed with water to make the paint more transparent. I painted over some of the white papers. I didn't think this looked very good or interesting. Oh well.
On another card I colored different segments with chalk pastels. I then used water on a paintbrush on top of that to make the color more deep. It looks very much like paint.
I then went to my box of papers and began looking at bunches of receipts and lists from the 1970s. I was thinking about how the papers were mostly white and boring. Then I noticed that some papers were colored. I had the idea to make a rainbow type of design.
I didn't have any red papers but I had about every other color of the rainbow plus pink. I layered the paper on a vertically positioned ATC and made stripes of rainbow colors. Due to the size of the ATC each layer was only about 1/2 inch high.
I liked that card so much that I made a second one.
I then had an idea to make a picture out of the papers. This idea came from looking at a green bank envelope and thinking it was the same color as a flower stem. I then selected a background card I made last month, with watercolor paints on watercolor paper. The color of the background was a dark pink. Using freehand scissor cutting I fashioned a stem and leaves. I chose a black color for the center of the daisy-shaped flower. I used a pale pink auto repair receipt from 1975 for petals. At first I tried drawing the petals and cutting them out but that was a pain in the neck so I just cut them freehand. I then glued down the papers and I loved the ATC so much that I decided to keep that one. By the time I finished that one it was nearly 1 in the morning and I was dead tired (or else I would have made a whole series of these flowers).
Saturday, September 24, 2005
Today I found this blog. The artist is painting aerial maps of certain places. It seems to me that she may be using the internet's images of aerial photos then making her own rendition of them using paints. The ATCs are labeled with the name of the places they represent. Go check them out!
This sounds like a great project. Even me, with my little talent, could paint something like this! I may try this soon!
This sounds like a great project. Even me, with my little talent, could paint something like this! I may try this soon!
Tuesday, September 20, 2005
Thoughts on some other people’s ATCs
I have been looking at other people’s ATCs on the web. I am amazed at the variety out there. I am in awe of the artists who do hand drawn ATCs.
I have been impressed by some of the images that I see, such great vintage photos and wonderful postage stamps. However, I found out that some of them are actually reproductions as printed on papers sold in the scrapbooking sections of craft stores. I was less impressed at that point. Call me a snob if you want to. I like the idea of an actual old postage stamp being used instead of a photocopy.
I see quite a number of people using embellishments. I am wondering where I can buy some of these, locally. I do see some internet stores selling them. They are not expensive but they are too much to spend on a small purchase with a shipping fee larger than the cost of the item. Then again, I am trying to make ATCs out of things I already own rather than buying items to use.
I don’t see many people using current magazine cutouts for collage. I see vintage magazine cutouts being used. Some of my first ATCs were made with cutouts from magazines I had around the house. I guess I am doing things differently than other people. My first thought was that I should change my method. I am trying to not be swayed by other people. Art is not necessarily about following the crowd. I am sticking to doing what I want with the materials I have on hand. This is about having fun, not feeling weird for not conforming with the masses.
I also realize that a number of ex-scrapbookers or current scrapbookers are now doing ATCs. I have seen ATCs that use embellishments intended for scrapbooking on the ATC. Some of the ATCs are only a collection of these such things. I find this interesting.
I love that we can all do our own thing. Art for art’s sake. I do hope people enjoy my ATCs, though.
With this said, I have a swap due in four days and need to get working on it. Homeschooling and mothering my children has taken priority and I have been concentrating on that. But with a deadline looming it is time to get creating. Maybe I will stay up late tonight and do it while everyone else is sleeping.
I sent in a swap that had to include a number on the ATC. I scanned the ATCs and will post them when I can.
I have yet to receive my first swap, the train themed swap. It should be here any day now. I can’t wait to see the ATCs that I receive!
I have been impressed by some of the images that I see, such great vintage photos and wonderful postage stamps. However, I found out that some of them are actually reproductions as printed on papers sold in the scrapbooking sections of craft stores. I was less impressed at that point. Call me a snob if you want to. I like the idea of an actual old postage stamp being used instead of a photocopy.
I see quite a number of people using embellishments. I am wondering where I can buy some of these, locally. I do see some internet stores selling them. They are not expensive but they are too much to spend on a small purchase with a shipping fee larger than the cost of the item. Then again, I am trying to make ATCs out of things I already own rather than buying items to use.
I don’t see many people using current magazine cutouts for collage. I see vintage magazine cutouts being used. Some of my first ATCs were made with cutouts from magazines I had around the house. I guess I am doing things differently than other people. My first thought was that I should change my method. I am trying to not be swayed by other people. Art is not necessarily about following the crowd. I am sticking to doing what I want with the materials I have on hand. This is about having fun, not feeling weird for not conforming with the masses.
I also realize that a number of ex-scrapbookers or current scrapbookers are now doing ATCs. I have seen ATCs that use embellishments intended for scrapbooking on the ATC. Some of the ATCs are only a collection of these such things. I find this interesting.
I love that we can all do our own thing. Art for art’s sake. I do hope people enjoy my ATCs, though.
With this said, I have a swap due in four days and need to get working on it. Homeschooling and mothering my children has taken priority and I have been concentrating on that. But with a deadline looming it is time to get creating. Maybe I will stay up late tonight and do it while everyone else is sleeping.
I sent in a swap that had to include a number on the ATC. I scanned the ATCs and will post them when I can.
I have yet to receive my first swap, the train themed swap. It should be here any day now. I can’t wait to see the ATCs that I receive!
Thursday, September 08, 2005
"East Meets West" ATC: Series: Riding the Rails
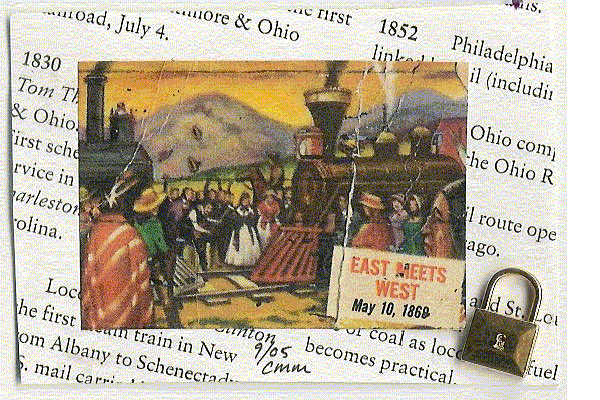
"East Meets West". #1 in a series of 8 for a swap for the Yahoo Group! "artisttradingcards", titled "Riding the Rails". Created 9/8/05. Original. Collage with embellishment of a metal lock.
The background is a page of text about trains.
The image is a copy of a little collectible trading card which I believe came in breakfast cereal, sometime in the 1970s. Note the not-policitally correct and not-historically correct image of a Native American watching the celebration of the two trains coming together. I don't believe this really happened. I say this is not-politically correct as I believe that Native Americans were very upset about the railroad and they would never have watched in the crowd like that. At least he is frowning.
The embellishment came with a bag of bargain buttons from the craft store, which I purchaed a few years ago and have been using to make crafts with my children. The lock is to symbolize the east and west coming together with the transcontinental railroad. I would have preferred tha the lock be opened but I was worried that if I cut it with a metal snipper that the edges would be sharp. I added the embellishment as I felt that it looked too plain without something else added to it.
"Wave at the Engineer" ATC: Series: Riding the Rails
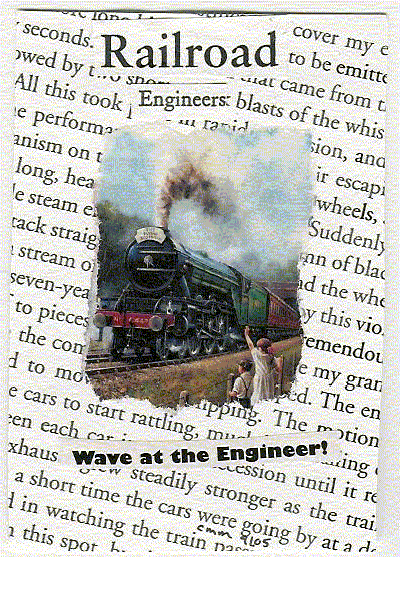
"Wave at the Engineer". #2 in a series of 8 for a swap for the Yahoo Group! "artisttradingcards", titled "Riding the Rails". Created 9/8/05. Original. Collage.
The background text is from a book about trains. I am not sure you can read it on this scan, but the original is very readable.
The image and words "Wave at the Engineer!" is from a model train catalog.
The other words are from other train books.
"Oilman" ATC: Series: Riding the Rails
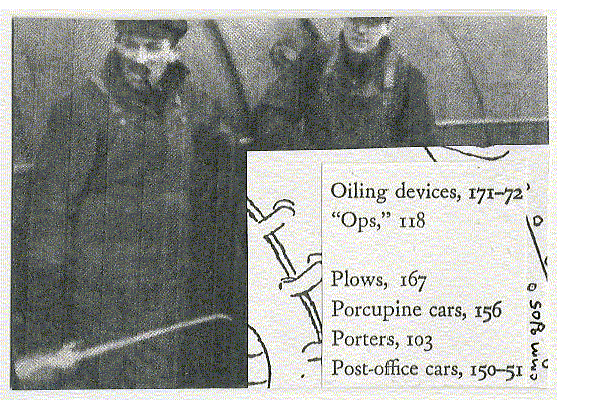
"Oilman". #3 in a series of 8 for a swap for the Yahoo Group! "artisttradingcards", titled "Riding the Rails". Created 9/8/05. Original. Collage.
The background photo is from a book which is a biography of the man who is holding the oil can, who was actually an engineer of a steam locomotive. I loved that photo! The white and black illustration is from a children's book about trains and is a small piece of an illustration of a steam locomotive. The words are from an index of a children's book about trains and contains references to the job of keeping the wheels oiled.
I toyed around with bringing color into the collage but it just didn't look right. I decided to keep the collage only in black and white colors.
"Telegraph Man" ATC: Series; Riding the Rails
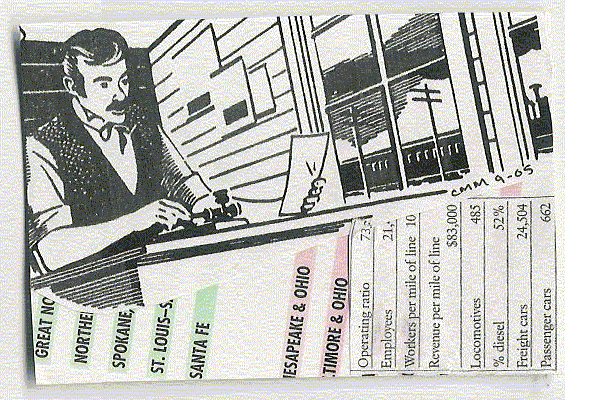
"Telegraph Man". #4 in a series of 8 for a swap for the Yahoo Group! "artisttradingcards", titled "Riding the Rails". Created 9/8/05. Original. Collage.
The background with images in pastel green and pastel pink are from a book which is an atlas of railroads in America. It is a timeline that shows the train companies and how they changed over time. The small box contains statistics, from the same book, about employees and costs associated with running a railway. The image of the telegraph man with the train in the background was taken from the same atlas. The two themes here were railroads as businesses and showing one type of important railroad employee who didn't actually work on the train (the telegraph man). I also liked that we see a train in the background.
I thought the blend of black and white and color was a good balance. I had tried to use colored images where the telegraph man is now located but it looked too cartoonish and too pretty.
"Their watches must keep nearly perfect time" ATC: Series: "Riding the Rails"
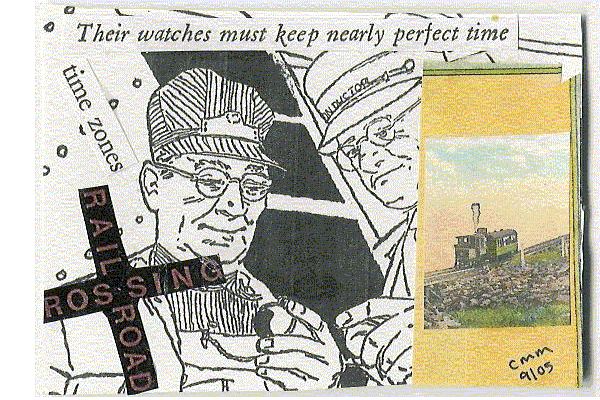
"Their watches must keep nearly perfect time". #5 in a series of 8 for a swap for the Yahoo Group! "artisttradingcards", titled "Riding the Rails". Created 9/8/05. Original. Collage.
The background illustration is from a children's book about the history of railroads. I loved this image. I snipped the caption from the illustration and put it at the top.
At first I put a cutout of a steam locomotive on the right side, but it ripped. I couldn't fix it or remove it so I had to cover it up. I was worried if I kept it there ripped, that the ATC would be considered of poor quality and I didn't want to disappoint the person who received this ATC for the trade. I had a hard time finding an image that would fit there but not be so large as to detract from the main background illustration. I decided to use the small image of the train, which is an antique postcard from about 1925 and shows what we now call the Mt. Washington Cog Railway in New Hampshire. That image was too small to fit there, as I had cut it out to try to use elsewhere previously. I ended up pieceing background colors from another part of the antique souvenir postcard book there, to block out the steam locomotive. I then glued the little train image on top.
I saw the railroad crossing image in the model train catalog and felt I should use it on one of the ATCs for this series so placed it on this one.
The last thing I did was add the phrase "time zones", which was cut out from the index of the same children's book that the background illustration came from.
Subscribe to:
Posts (Atom)


