Tuesday, January 31, 2006

My ATC: Family: A Balancing Act


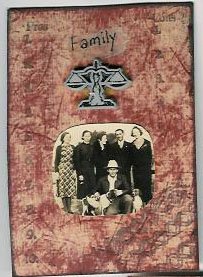
Title: Family: A Balancing Act

This ATC was made as part of a themed swap called "Found Photos". The photo was sent to me by the swap hostess.

Here is how I made it.

First I looked at the photo and really looked at the faces of the people. I looked at the body language and it seemed to me that some people were not happy. I didn't know if they were not happy to have their picture taken or if they truly were not a happy family.

I created this in mid-December when things were getting complicated with family, plans for Christmas, etc.

I wanted the focus to be on the people not on the boring background images, so I cut the family out of the photo.

I chose a handmade paper in a complimentary color and applied the photo. However it looked too plain. I decided to use a rubber stamp pad to add color to the surface of the background paper. As I rubbed the stamp pad across the surface, I was surprised to see how it picked up the raised texture of the paper. I liked the effect.

I didn't quite know what to do next. I thought I should do something to embellish this so started looking through my rubber stamps. I found two, one said "Pros" and had numbers, and the other said "cons" and had numbers. I then thought about how to keep family harmony is a balancing act and how sometimes there are pro's and con's to living near family, such as at holiday times. I used black ink to apply the "pro" and "con" rubber stamp images. (Note: I bought these stamps used on eBay and don't know who the manufacturer is.)

I used another rubber stamp with a fancy line-design in the lower corner (three times) to add a little something to that dead space.

I then wished I had some image of a scale and remembered that a button assortment I had bought about four years ago had a scale button. I cut the back off so it would not protrude as much. I used Golden Acrylic Gel Medium (regular) to apply the button.

I hand wrote "Family" onto tissue paper and applied it. The 'balancing act' is implied by the set of scales.

Lastly, to give a finishing touch I dragged the edges of the ATC across a black ink stamp pad.

I love this ATC and wished I was not swapping it out.

I wonder if the person who received this likes it?

Monday, January 30, 2006

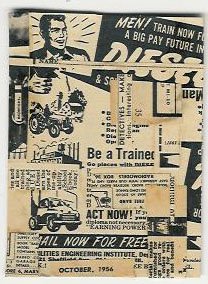
My ATC: Men! Train Now


ATC Title: Men! Train Now

This ATC is yet another made from ads from the October 1956 issue of Mechanix Illustrated magazine. The ads focused on enticing men to learn new careers which would make a successful entrepreneur or rich with free training or a low cost mail coorespondence course.

Sunday, January 29, 2006

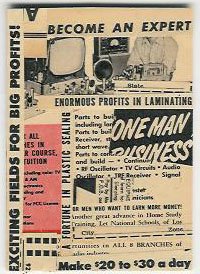
My ATC: Become An Expert


ATC Title: Become An Expert

Yet another ATC made from original papers from ads from the October 1956 Mechanix Illustrated magazine.

Saturday, January 28, 2006

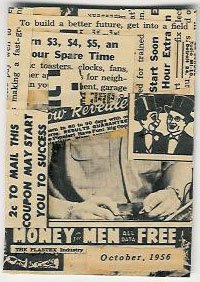
My ATC: Money Men Free


ATC Title: Money Men Free

Yet another ATC made from original pages (ads) of Mechanix Illustrated October 1956 issue. These ads target men who are looking for a new career or profession to earn money, preferably to 'get rich quick'.

Thursday, January 26, 2006

My ATC: At Less Than Wholesale


Title: At Less Than Wholesale

This is another ATC made from ads from the October 1956 issue of Mechanix Illustrated. These ads focus more on buying things at discount prices. I am not sure if the men were supposed to buy them to resell them for profit or if they were just selling items for the consumer to use.

As with others in this series I was inspired by a certain collage I saw in a history of collage book. There was one collage made by a Dada artist which was very geometric.

I like these ATCs as they are little snapshots in time, like a little time capsule.

I was just looking at a 1969 Mechanix Illustrated magazine and see that they had changed the format of the magazine. Gone were the numerous pages of tiny classified ads and the other very small ads such as these.

Wednesday, January 25, 2006

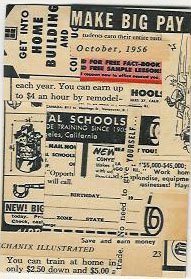
My ATC: Make Big Pay


ATC Title: Make Big Pay


This is another in the series I am doing from original pages from an October 1956 Mechanix Illustrated magazine. These are ads for men about finding new careers with minimal cost or effort, that will make them rich.

These are collages done with an inspiration by the Dada movement. They are very geometric.

I love the color of the papers, the paper is a newsprint type of paper which has oxidized or 'foxed' over time.

My father gave me these magazines recently. I am not sure if he found them at my grandmother's house or if he found them elsewhere.

I am making these for fun, to keep or trade, not as part of a swap.

Tuesday, January 24, 2006

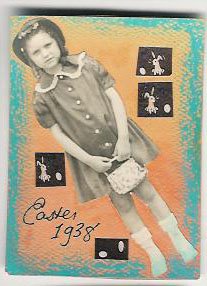
My ATC: Easter 1938


ATC Title: Easter 1938

This ATC was made for a swap called "Found Photos". The hostess sent me some antique photos. I was to make five ATCs from those photos. The photos were to be originals, not copies.

This photo was larger than the ATC size so I had to reduce it in some way. I decided it looked better to cut the girl out rather than to make a rectangle shape. She was standing on steps that led to a doorway of a house. The back of the photo had a date in 1938 which was from the spring. The way she was dressed made me think perhaps this was Easter and this was her Easter dress. It could have been any other day but people usually took photos of their children in their new Easter outfits.

The background is watercolor paper which I painted upon with watercolors. The blue is an oil pastel crayon. The black ink is a permanent drawing pen ink with my own handwriting.

I wanted something else to fill the ATC so looked through an old Hermes tie catalog. I found the images of the Easter bunnies and eggs in that catalog. Yes, those are designs from a Hermes men's tie. I would have preferred to have antique images of Easter themed things, but when I tried printing images from the internet on my home printer they were a terrible quality. The quality of my home laser printer is just terrible. The copies showed too many pixels.

I liked the way the ATC turned out. I am still wondering what the little girl is thinking, though!

Monday, January 23, 2006

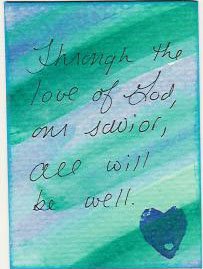
My ATC: All Will Be Well #2


My ATC: "All Will Be Well #2"

Here is another ATC I made for Lynne.

Again the text message is the main focus. Therefore there is not a lot of visual clutter.

The background paper is watercolor paper and it has been painted with watercolor paint. The message is a line from my favorite hymn "Through the Love of God Our Savior" by Mary B. Peters. The text was written with a drawing pen. The heart image is my hand carved stamp (from a wine cork). The border is a blue rubber stamp pad ink which I dragged the ATC through.

Simple and Clean. It gets the message across. It meets my goal.

Friday, January 20, 2006

My ATC: Profitable


This ATC is called "Profitable" and was made from the October 1956 Mechanix Illustrated advertisements. It was inspired by a Dada collage I saw pictured in a book on the history of collage.

Thursday, January 19, 2006

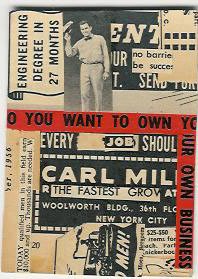
My ATC: Do You Want To Own Your Own Business?


This is my ATC which I titled "Do You Want To Own Your Own Business". I had fun making a series of collaged ATCs from original papers from an October 1956 Mechanix Illustrate magazine. My father gave me this magazine which he found at my grandmother's home. It was going to be thrown away.

I cut ads from the pages which were advertisting careers for men. Some of the ads touted free training for careers while others advertised coorespondence courses. Some ads promised riches from various industries such as laminating plastic or importing items for pennies per unit and selling them for $2.

Each ATC is like a tiny time capsule. Some of the text is very tiny. I am not sure if the resolution is high enough for them to be seen well on the screen.

Let me know what you think of these. I am going to try to post one ATC per day. So far I have made eight in this series.

Tuesday, January 17, 2006

ATC Play Yesterday

I was really happy to be able to spend some time making ATCs yesterday. I was coming off of a week of heavy duty decluttering, putting away Christmas decorations, new toys, and doing a bulk cooking marathon. I needed to have some fun. Some alone time was also needed. My children went to a friend’s house for a playdate. My husband went to visit and help out his parents. And I was alone in the house!

The sum total of what I did yesterday was: some cooking, some light cleaning, and played with making ATCs. (I almost said “worked on ATCs but it is really fun play so I changed the wording!)

I made five easy ATCs for a person on an ATC chat list whom I don’t know who suffered a stroke at what I think is a very young age. I put thought into them. The technique was easier than I usually do. I started posting images of these on this blog. These are much simpler than the ATCs that I usually make. Since I wanted a definite message to come across I felt that the text should speak for itself. As I made these I was praying for her. I packaged these up and prepared them to go out in the next day’s mail.

I made five new ATCs using a 1956 issue of Mechanix Illustrated magazine. In the Dada and art deco type style I made collages using original ephemera from pages of advertisements.

I also did more work on five ATCs that I thought were finished but really looked ‘unfinished’ to me. I didn’t like them as they were. I played around with some tinted acrylic glazes, gel pens and stamp pads to further embellish the ATCs. I like them better now.

It was nice to have a few hours to myself. I was able to get into that flow mode, then I took a break from it to do some cooking then I got back into the flow mode again. I find that it is a great escape from the stresses of reality and when I am finished I am left with a very calm and happy feeling which remains with me for the rest of the day.

Today I need to make the backs for the ATCs and then they will be ready to swap out.

Monday, January 16, 2006

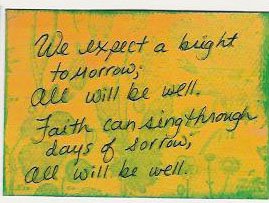
My ATC: All Will Be Well #1


"All Will Be Well #1"

This ATC has a background of watercolor paint on watercolor paper. I wrote some lines from my favorite hymn "Through the Love of God Our Savior" by Mary B. Peters. I wrote it with a calligraphy pen and ink.I was annoyed to see the ink bleeding into the paper. I then rubber stamped over the whole thing with a large rubber stamp of botanical images. The color was too bright so I painted over it with a glaze which was tinted yellow, however, that smeared everything a little, just enough to be bothersome to read. As a last ditch effort I re-wrote over the original text with a drawing pen. I thought it was now alright to read. I finished by making a border by dragging the edges of the ATC on a rubber stamp ink pad in the same color green as I used for the botanical print stamp.

One note is that for whatever reason the colors on my computer screen are not accurate. The real ATC has a deep and more orange tone. What I see on my screen is a bit more garish and more yellow. If the real thing really looked like this I would throw it away!

My ATC: Love Heals All


My ATC: "Love Heals All"

This ATC was made on watercolor paper with a watercolor painted background. The text is rubber stamped. The heart stamp is one of the homemade stamps that I made by carving a wine cork. There is a thin border of pink ink which was done simply by dragging the edge of the card across the ink pad's surface.

This ATC is not be high tech or complicated. The goal of this ATC was to get a message across, a message of encouragement and healing. I think it fulfills that goal and it is pleasing to my eye.

Made Five ATCs for Lynne Today

Today I worked on making some ATCs for a new member (named Lynne) of an ATC chat list who suffered a stroke. I do not know this person but learned of this through Lynne's friend who posted an email to the Group about Lynne's condition. This hit too close to home as she is the same age as I am (38). She lives in an area close to where my mother grew up (in another state). I was just there last week.

I made five ATCs to send to her with a typical Get Well card. As I made these I was praying for a full recovery for Lynne and I was also praying for her family and friends to remain strong and keep their thoughts and prayers positive and hopeful. I feel strongly that prayer can help healing and that conversely, negative or pessimistic thoughts can hinder healing.

Things didn't go so smoothly today for making these ATCs. To get five good ATCs I made mistakes and messed up four others.

All five ATCs were made on watercolor paper with a watercolor painted background. Some were rubber stamped with text messages which I wanted to be the primary focus of the ATC. Some were hand written by me and are quotes from my favorite hymn which is called "Through the Love of God Our Savior" and is Hymn #350 from the Christian Science Hymnal. That hymn can be read and the tune can be heard here. Because I wanted the ATCs to have a clear message these are more text-focused rather than being centered around visual images.

My creative juices are flowing now and after I post this I want to go make more ATCs, perhaps with collage. I also want to do more experimenting with painting with tinted acrylic glaze.

Sunday, January 15, 2006

Thoughts on Quality of ATCs We Swap Out

Here is a copy of a post I put on an internet chat list tonight. It is about quality of ATCs that we swap out.

The conversation started when someone asked to do blind swaps in small quantities. A person replied saying she received various poor quality type ATCs in those kind of swaps. She asked that anyone who does a blind swap should put their best foot forward and not send junk or ATCs which were mistakes. Here is what I added to the conversation.

Will add that if you send ATCs with embellishments in a plain envelope they make break in transit. So if you have an embellishment on there I advise to use a bubble wrap envelope.

With that said I like to tell myself that ALL the ATCs are made with the best foot forward. I have a feeling that when I think something is ‘sub par’ that the artist thought it was good. If I thought people were intentionally sending junk it would depress me too much!!

My current pet peeve is when a digital image is used and it is manipulated or for whatever reason when it prints off with a lot of pixels showing rather than looking like a clean image, and/or it is stretched out and weird (and it is not intended to look abstract), that to me is poor quality. (I have tried using some online images and sometimes it looks great on the screen but I guess my printer is not that great and the printout looks lousy—so I don’t use that image.)

One last thing I want to throw in is that a newbie sent me some ATCs that were not on cardstock. We cooresponded privately and I politely explained that they are not supposed be on magazine-thin paper, it is too flimsy and will damage quickly, that the cardstock thickness (or thicker) is a rule. She said that people on the list keep saying the only rule with ATCs is the size. Well I think if anyone says that they need to remember it is a ‘card’ and the 2nd rule is that it be cardstock or heavier! Gentle reminder there for all of us.

I think blind swaps are risky but not more risky than any type of swap other than a private swap in which the person viewed the online image of the ATC. Oh and sometimes the online image of the ATC looked great but in person it wasn’t that great, so I guess even that is not foolproof.

In the end we are all human. I try my hardest on my own ATCs. Sometimes I like certain ones better than others but don’t send out any that I think are mistakes. I hope others don’t do that!

Saturday, January 14, 2006

About PostSecret

A couple of weeks ago I discovered PostSecret.

I found out about this while shopping on Amazon and saw that other people who bought the books I own had also purchased the PostSecret book, compiled by Frank Warren.


In reading about the book I found out this started with a website. I immediately pointed my browser to the site to check it out.

Apparently millions already know about PostSecret, so I have been in the dark. I will share the information in case you are also in the dark.

Here is what it is and how it works. If a person has a secret, being defined as a secret that they have never told anyone else, and then they qualify to participate. The person designs their own 4x6 inch postcard and mails it to a certain address. This is done anonymously. This is kind of a confessional and catharsis thing.

Selected postcards are featured on the PostSecret website. The new images are uploaded each Sunday. The site only shows the images for one week; there are no archives.

A book has been published which is a compilation of some of the submissions to date. The book is fascinating. I bought it with money that was given to me for Christmas. Unfortunately I don’t feel that it is a good coffee table book for our family as some of the images and content are inappropriate for children.

Last week an art exhibit in Washington D.C., of PostSecret postcards ended. I read that over 15,000 people attended. I would have liked to have gone!

I find some of the postcards hilarious and others very sad. Some have even brought tears to my eyes. It is hard to believe some of them, I wonder if some are made up for shock value just to get published.

Before you view the site be forewarned that some of the content can be emotionally disturbing or inappropriate for young children, or for you to view while at work! Some of the content may even disturb an adult or be against your morals or beliefs. For example the secret may be about a rape, sexual abuse, sex, or any other type of sin. The secrets are also sometimes funny or silly. Some have nudity. You never know what will appear. A recent one that caught my attention was a reference that a woman is scared she will never be able to conceive a child again, and stated she ‘killed’ her first baby (I assume through abortion).

If a person’s postcard is featured on the site the person sometimes writes in with comments or background information about their postcard.

If you want to send in a postcard, here is the address to use:

PostSecret
13345 Copper Ridge Road
Germantown, MD 20874-3454
USA


What do you think of PostSecret?

Monday, January 09, 2006

Hosted My First ATC Swap

Today I spent time swapping out ATCs for an ATC Swap that I am hosting. This is the first swap that I am hosting. The theme is "Baby". The requirements were that there must be an image of at least a baby face on the card, everything else was up to the players.

I am learning some lessons as I go. I think I will write these up and post them on another day.

My favorite part of this is seeing all the different ATCs that people make. I also am keeping one from each player so I get to choose my favorite one of each grouping, which is great!

Originally I said it was a 5/4 which meant that they send me 5 and they get back 4. However since I had about a dozen participants (in the end), I decided to make one ATC for each person. Now each person is getting 5 back so in reality it was a 5/5 swap.

I really think that for all of the time and energy that I spent that sending one extra so the hostess can keep one is not asking too much. A few people sent a few extra goodies in the way of ephemera to me as a gift which was GREATLY appreciated and very fun to receive. Since I first heard of that practice I have been doing that for all the hostesses.

On one of the chat lists a recent discussion was about that topic and some said that they would refuse to participate in a swap in which the hostess wanted to keep one for herself. I hope that each person who feels that way will someday host a swap and see all the time that it takes. I would estimate that including emails back and forth through this whole process plus preparing the swap and going to the post office, that I have spent about 5 or 6 hours on this task!

One bummer is that someone from the Netherlands said she sent her envelope on December 7 but to date it has not arrived, so she did not participate in the swap after all. I wonder if it will just be delayed in getting here or if it is truly lost?

Anyway I look forward to hosting another swap in the near future. I really liked hosting, it was worth the time and effort!

Sunday, January 08, 2006

Thoughts on My Journal & Recognizing Artists Work

I am at a point where when I read books or magazines about journaling or collage or 'altered art' I can recognize some of the artists just by their style. I am surprised that this is happening. I now can pick out immediately, work done by: Teesha Moore, Tracy Moore, Lynne Whipple, Lynne Perrella and Claudine Hellmuth. Pretty good for someone who has been into altered art for just four months. Or maybe that means I am doing too much reading about this topic!!

I am inspired by the work that others do. I am at a point though, where I enjoy looking at some of it, and am inspired by some of it, but I am not always interested in copying and recreating what someone else has done. (This is why so many of the paper arts magazines and books do not appeal to me. I want to create my own thing not just have a step by step process of what someone else has done.)

The best thing for me is to be inspired to try something new and to interpret it in my own way. For example I may try a paint technique that one artist wrote about, but I use a color that is more appealing to me.

What it has underscored for me is that what I think is important for me at least to find my own style and to feel happy with it. I do have my own way of doing things but sometimes in the recent past I'd read or see something and feel that perhaps I should be doing THAT instead of THIS. Sometimes it would make me feel that what I was doing is not good enough.

I am my happiest when I am creating things in my own style. I did a lot of work in my artist journal last week. What I did is unlike anything I have ever seen pictured, and that is now okay with me.

I have stopped beating myself up about my journal because it doesn’t look like someone else’s. I don’t like it when people say you should do this or that. That includes the recommendation that in a journal an artist should really work to have a minimum number of words vs. images or artistic elements. Right now what feels right for me is to have a blend of words with artistic elements. Now I am journaling using fewer words than I used to. My past attempts to journal with words only never became a routine thing as just sitting and journaling in long hand writing was boring to me. (Actually blogging is a form of journaling; it is just online so I do spend time daily on this blog or blogging on my other blog.)

Anyway at this point I am having fun. My journal has watercolor painted background pages which were fun to create and are fun to write on. I am having a blast collaging on top of the pages with ephemera from my daily life or with images or cut out words or phrases that apply to my life or to what is being written about on that page. I also am doing some rubber stamping in the journal. This is a nice balance for me.

If I get brave I may post a scan of some of my journal pages. I am not ready for that yet, though.

Thursday, January 05, 2006

What I Am Doing This Week

This week my children and I are in Maine visiting my grandmother. My husband (and cat) are home holding down the fort.

Due to me not having a computer up here (other than this slow connection at the public library), I have more time on my hands this week. I am using it to make art and relax.

Monday night I was stressed due to having the kids on my nerves. I put a movie on for them to watch and went into the other room. I took out ephemera that I gathered while on the 500 mile drive up here (maps, travel brochues, etc.) and cut out some stuff to glue into my journal. I also wrote in my journal.

Tuesday I visited the library and found a large bunch of free magazines. I took four and on Tuesday and Wednesday cut them up after reading through them. My children and I all were cutting them up. I glued pieces into my art journal. My kids glued things into their own gluebooks. Actually they are now also drawing in their gluebooks so I guess the right term for them is now a journal.

Right now I am at the public library and will see if there are any other good free magazines that they are giving away.

Three times so far this week I got into that "flow" thing which is always great to experience. My journal is turning into something quite unlike any other journal I have seen pictured on the web or in various books or magazines. I think that is a good thing as it is turning out to be a reflection of me and my style, instead of me copying what someone else is doing.

I keep telling myself that there are no mistakes in journaling. I can't remember if it was Teesha Moore or Lynne Perrella who said that but anyway...it is true. I am experimenting and if I don't like the outcome I change it. I am not chastizing myself if something I try doesn't come out well.

Altered Book

This week I started my first altered book that is not a board book base. What a pain this is turning out to be.

I am doing the method where I glue 12-15 pages together with acrylic gel medium (Golden brand) and holding that together with bulldog clips until it dries. I am trying to be careful but it is messy. The clips are getting glued to the pages themselves.

Not all the pages stick and I had to reglue some.

Some of the glue is bumped up and a mess. I bought some sandpaper from the local hardware store (gasp--it is not a Home Depot!). I sanded down the edges to try to fix that.

I have watercolor and acrylic paints up here, as well as my tinted glazes.

I am wondering why I have not seen anyone complaining about the not so perfect side of making altered books. Or am I the only one who is experiencing this?

If it is always going to be a pain I will stick to making my own journals from thick paper and binding them myself. Really, it was not hard to make my own hardback journal.

Okay I must get off the internet now. We are limited to 15 minutes at a clip here at the public computers at this library.

Happy New Year!

Friday, December 30, 2005

ATC Making Last Night

Last night I made 14 ATCs with a baby theme for the swap that I am hosting which is due tomorrow. I decided to give each participant one ATC from me.

I have about 12 participants in the swap right now. I say 'about' because I keep getting swaps in the mail from people who never told me they were joining. The deadline is tomorrow.

I also made up extra ATC sized cards which state the name of the swap, the date of the swap, and the online chat group that the swap went through. I will give each participant one card.

Today I began gathering extra ephemera for an ephemera swap that I am doing with one person from one of the chat lists.

Today I spent time doing collage work in my journal. I also went through some of my grandmother's papers. Some that I went through today went back to 1943. Looking at the letters, greeting cards and other ephemera is like traveling back through time.

I stopped the art making as we had a family come over for a playdate.

I also discovered LibraryThing.com today and began entering our books into that online database. You can go view my books under my user name of ChristineMM. I haven't gotten to the art books yet, though.

So that is what I am up to in the last 24 hours.

Happy New Year everyone!

Thursday, December 29, 2005

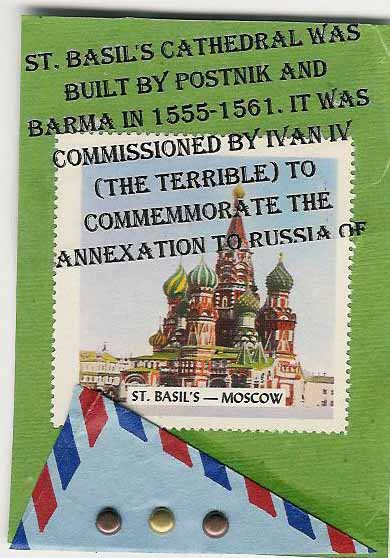
My ATC: St. Basil's Cathedral


Here is my ATC titled "St. Basil's Cathedral". I made this in October 2005 as part of a Seven Wonders of the World ATC Swap.

The base is handmade paper (store bought). The image is a Cinderella stamp which I acquired as a child in the 1970s and saved as part of my stamp collection. (Recently I saw the set of these for sale on eBay if you can believe it.)

I looked up information about St. Basil's Cathedral on the internet and copied and pasted it inside of a Word document. I then revised it so I was not plagarizing the orginal text. I changed the font size to be a good size for the ATC and cahnged the font to one that I thought looked good. I printed the text on my computer printer on regular white copy paper. I then did a packing tape transfer of that writing.

I used the corner of an air mail envelope that I had saved from a letter from a Russian Pen Pal that I used to coorespond with. The Pen Pal project was a project for peach from the late 1980s. The intent was for Americans and Russians to make friends with each other in an effort to bridge our nations.

I used brads from the craft store to finish this off.

Wednesday, December 28, 2005

I Am Now an Amazon Associate

In order to try and earn some income for our income-less family I just became an Amazon Associate. If you link through this blog to Amazon and add something to your shopping cart and finalize your purchase within 24 hours I will make a small commission. This counts towards anything you buy even if I never mention it on my blog or it is something totally irrelevant to my blog's content. I get paid and your confidentiality is intact (I won't know who bought something or who bought what).

So if you want to help me make a little money and you are going to buy something from Amazon please consider linking through my blog. You can use the general search box in the sidebar or any of the links that I am going to be putting into my blog entries.

Thanks for considering it!

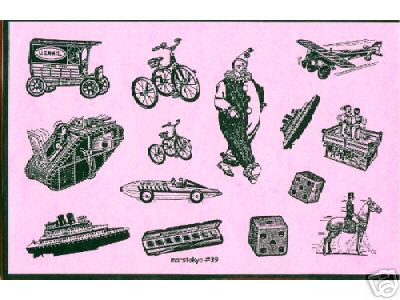
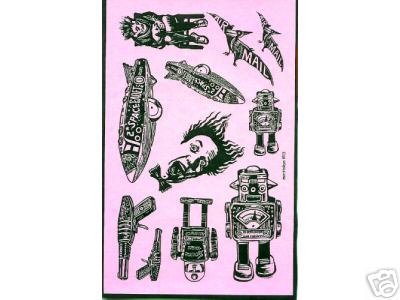
Cool Rubber Stamps on eBay by Mars Tokyo/Adorned Surface/Hissyfit


There is a company whose rubber stamps I love. The company is called Mars Tokyo/Adorned Surface/Hissyfit. After corresponding with the owner, I was told they sell exclusively on eBay. You may find them most easily by searching for auctions by the seller name: Sass*box.

The stamps are new and of their own design. They are unmounted sheets. The auctions I saw were 5.5 x 8 inches in size. Each auction I saw had a buy it now price on it of $7.50 and most had starting auction bids set at $6.00.

This is their Angel Policy: "We Allow Hand-Stamped Images To Be Sold For Profit. No Mechanical Reproductions Are Allowed".

Each sheet has a name and a number.

I won two of their auctions. The shipping rates were Priority Mail rates. The shipping was very fast, as if they sent it the same day as the auction closed. They are willing to combine shipping if multiple auctions are won (which for me meant just the base price for Priority Mail).


The ones that I bought were: “Robots Outsider Art #13” and “Boy Toys Clown Outsider Art #39”. Some of the images remind me of antique Sears catalogue etched illustrations.

Check out their unique artsy eclectic stamps!

Tuesday, December 27, 2005

Discovering Tony Fitzpatrick’s Work

In the zine Play issue 4, published by Teesha Moore, I saw Tony Fitzpatrick’s book “Max and Gaby’s Alphabet”mentioned and recommended.

I am a big fan of children’s alphabet picture books and set out to buy it. Unfortunately it is out of print. I found a copy for about $12 on Amazon—used. I purchased it and then the next day I received an email saying it was sold previously and is no longer available. Darn. I can’t find it on the web, used, for less than $47, which is out of my price range.

Here is the Tony Fitzpatrick's website. I find his work very interesting. It is very detailed and there is a lot to see. The artwork from his latest book called “The Wonder Volume One” is featured on his website and gives you an idea for what his work is like. The prints from that book, and from “The Wonder Volume Two” are for sale on the site.

Here are some of the books that Tony Fitzpatrick has written. By just looking at the covers on these links you can get an idea for what his artwork is like.

Drawing/Collages 2006 Wall Calendar


The Wonder Volume One


The Wonder Volume Two


Dirty Boulevard


Bum Town


Max and Gaby's Alphabet

Monday, December 26, 2005

Feeling Inspired by Susan Cohen’s Journal

I was reading a back issue of the art zine “Play: the Art of Visual Journals”, issue 4, for the first time. This is a back issue which I received as a gift for Christmas (yesterday). The back issues of this zine are still available for purchase from the editor, Teesha Moore, on her website.

I saw Susan Cohen’s work for the first time in this issue of “Play”. I was inspired by her use of rubber stamps and color to make collage images.

Here is a technique which is my interpretation of how she did her artwork.

I see color on pages such as is applied with paint. Rubber stamping is then done on top of the colorful page. Most of the time she is using colors other than black as her rubber stamped image’s color. Some of the rubber stamped images are on the larger side. Then she cuts up the images so that not all of the rubber stamped image is visible. These various pieces are then collaged into the journal. The journal page of hers which I am looking at uses lots of squares and block shapes. The background colors are varied as are the rubber stamp colors. There is a mix of text, numbers, and drawn rubber stamped images. There seems to be many layers of collage here. The page is full of color and images. I absolutely love the look of her work and am inspired to try it.

Follow-up: I wrote the above last night. I then went to work putting acrylic glaze (paint product) which I tinted with acrylic (craft) paint, onto white paper using a stipple brush. This dried overnight.

Today I am working on using lots of different rubber stamps in various colors all over these three pages. After they are dry I will cut them apart and will use them to make collages in my journal or perhaps even to make ATCs with.

About Using Parts of Images
I am still trying to get over my “issue” with not showing entire images or entire documents. I have blogged about this in the past. If you missed it basically I have a hard time cutting up ephemera or images and not showing the whole thing. I love the look in other people’s work but it almost feels painful for me to do. I guess I have this thing with liking the entire image and wanting to preserve, keep and remember all of it. I fear that the unused portion will somehow be missed or forgotten and therefore the journal page or ATC or whatever I am making will suffer for it. However always using entire images, especially if they are large, is not always possible or really restricts the options for what can be done on a certain sized canvas. Also I have noticed that including the entire image or document sometimes ends up dominating the whole piece in a negative way.

Back to Susan Cohen
So that I could share it with you, I looked up “Susan Cohen” on the internet and found a site just loaded with her journal art. Here it is. I don’t see an example that is very close to what I am looking at in Play but these images are inspiring also. Enjoy!

Saturday, December 24, 2005

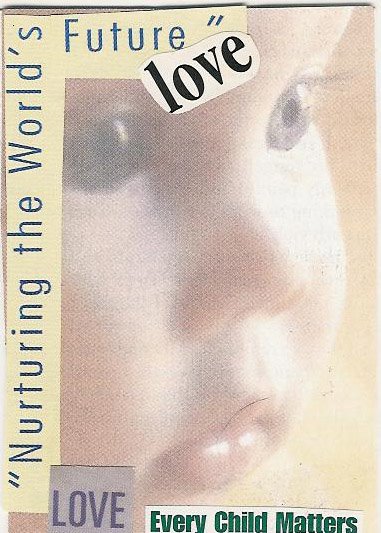
My ATC: Nurturing the World's Future


Here is another of my first ATCs. As with others that I made in the beginning this is just made with magazine cut-outs used to make collage. The baby face is from a magazine ad from an old Mothering magazine and some words from Mothering and O (Oprah) magazine.

Since this was one of my first ATCs, it was made before I saw a lot of other ATCs. My first ATCs had text on them, always, and also had a message behind them. Since I have been trading for four months now I see that many ATCs have no message at all, some are pretty or beautiful while others are themed but don't have some heavy message to them. Just an observation...I am not saying one is more right than the other. As I continue to post scans of my ATCs you may notice that my first ones were more original as they were not being done intentionally to do a themed swap, and they also have text and have a message. My most recent ATCs are not as serious or heavy as my first ones were.

My ATC: Mom's Happy at Home


This was one of the first ATCs that I made four months ago. This collage is from cut-outs from an about 13 year old back issue Mothering magazine and some words from O (Oprah) magazine.

Fun Christmas Video

This is someone else's artistic endeavor. Enjoy!

Here is a fun video clip that you and your children may enjoy!

Thousands of lights are synchronized with Trans-Siberian music for this Christmas spectacular.

Friday, December 23, 2005

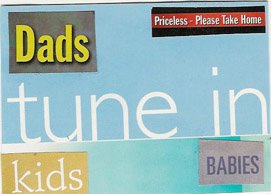
My First ATC: Dads Tune In


This was the very first ATC that I made. This collaged piece was made with cut outs from O (Oprah) Magazine and from Mothering magazine. While making it my husband and I were having a conversation about some of the fathers that he knows who are really disconnected from their children.

The priceless comment refers to the fact that fathers are priceless. Fathers should be more than just money-providers for their families.

We both feel that it is best for children and families when the mothers AND FATHERS are connected to their children.

Research also shows that these close connections help reduce children's stress, raise self-esteem, contribute to less drug and alcohol use in minors. Additionally depression rates in teenagers and suicide rates in teens who are closely connected with their parents are less. If this is a topic that interests you I suggest reading books by Dan Kindlon.

Watercolor Pages for My Art Journal

Having Fun Making Art

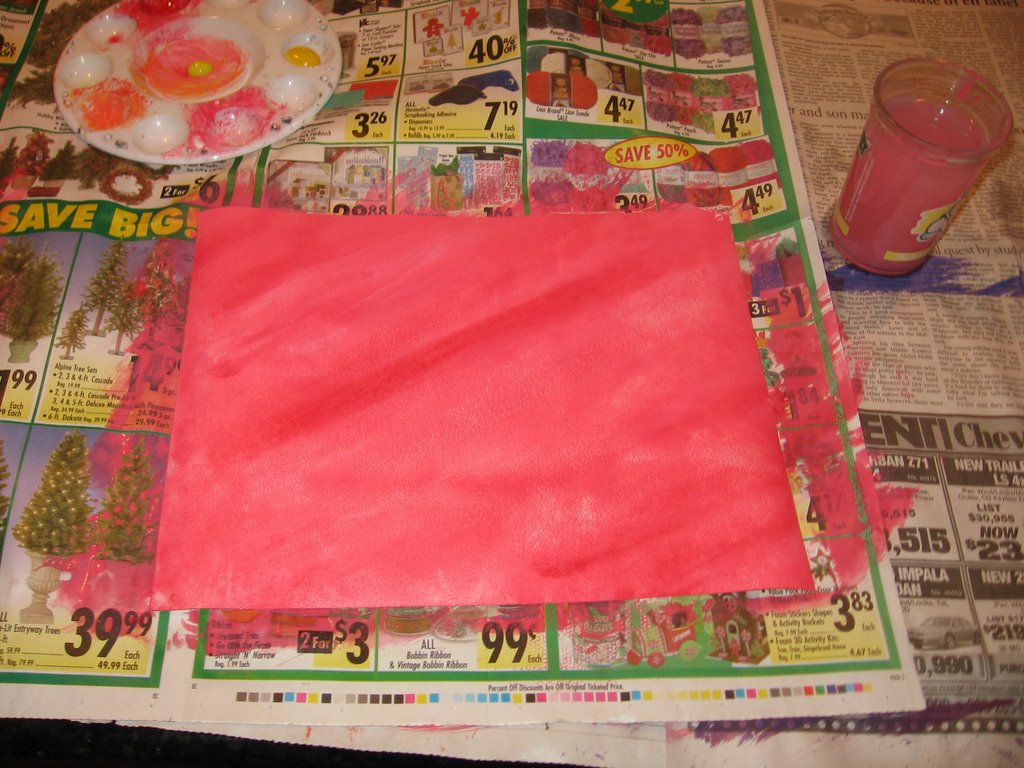
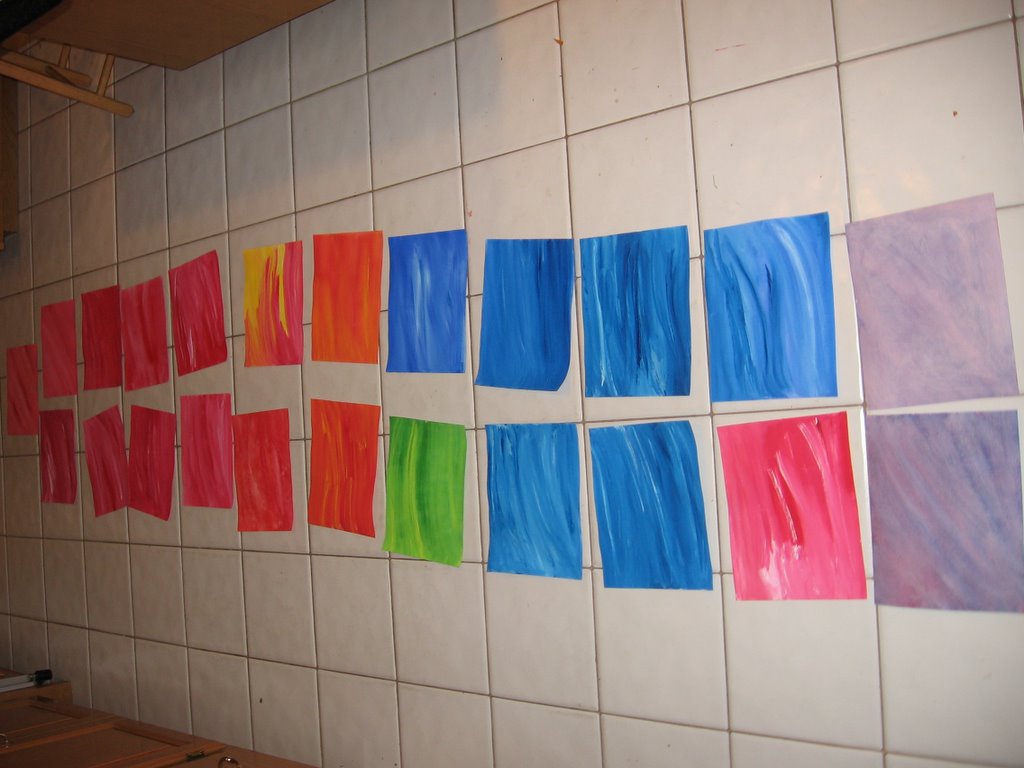
I painted with watercolors one day when I woke up very early, while everyone else in the house was still sleeping. I squeeze making art in any way that I can.

These were used to make the the base pages of my artist journal.


I snapped this photo as they were drying. I laid them down on my kitchen floor to dry. As you can see the pages curled as they were drying.


After they were dry I ironed them to make them lie flat, then I painted the other sides while we were on a break from homeschooling. Here is a photo of the other side.

Later I bound these pages into a hardcover journal which I have blogged about previously.

I have been having problems uploading images to Blogger. Today I am spending time trying to upload. I am glad these worked! Now only if I could get scans of my ATCs to upload!

Problems with Photo Uploading

When I began this blog my intent was to show photos of my artwork and to talk about it. I continue to have problems uploading images to Blogger. Most of it stems from the image size of my original file being too large for Blogger’s rules. I am also having problems teaching myself to use Photoshop such as trying to figure out how to cut and crop original images to make a new file which is the shape I want it to be (such as the exact size of one ATC) then also how to save the file in a low dpi resolution so that Blogger will let me upload it. Sigh.

I want to spend my time making art and writing not using software programs to manipulate digital photos. I don’t find that fun at all, probably because it is so new to me and I am finding the online Photoshop ‘help’ section very difficult to navigate and understand. Sigh.

Thursday, December 22, 2005

Abercrombie & Fitch T-Shirts Look Like Transfers

Yesterday while at the Barber Shop with my sons I looked at a large Abercrombie and Fitch clothing catalog. There was a line of tee shirts for men with what I am assuming was a silk screened image but it looked like an image transfer onto cloth. This could easily be reproduced at home.

There are two different components to the Abercrombie and Fitch tee shirts. One is that first the shirt has a look as if it was a t-shirt with an image on it that is now being worn inside-out, and then there is a ‘newer’ looking image on top of that other side.

This could be duplicated at home by printing text on your home laser printer and doing a transfer, without reversing/flipping the image. This would make the text come out backwards. If the transfer is rough and scratchy this would also achieve the look that the image was really on the other side and the shirt is being worn inside-out.

The darker, newer looking image could be applied with an iron-on transfer. You could make the graphics in Photoshop and then use the image-flip tool and print the image on an iron-on transfer sheet. This way when the iron-on transfer is applied, the writing is the ‘right’ way and would come out very solid and “new” looking.

Here is one example of one of their shirts in the “attitude tees” line for men.

I can’t find images online that matched the catalog that I viewed. Some of the new tees had a very rough and scratchy image which is very much like the image that is achieved when doing a Citrasolv or Acetone transfer. This could easily be done at home using an image printed off with a laser printer and the transfer medium (i.e. Citrasolv). Seeing those t-shirts was inspirational to me because I realized I could replicate this at home inexpensively and hey, it is ‘in style’, too!

Here are some directions for doing Citrasolv transfers, with illustrations so you can see what I am talking about, if you haven’t done them yourself yet.

Wednesday, December 21, 2005

More Journaling Done Last Night

Last night while my husband was cleaning the dinner dishes I played with my kids. Then my kids went off to play with each other. (Later they showered themselves and got ready for bed all on their own--what a great thing for them to be able to do at ages 5.5 and 8. Hooray!) My husband began making a mincemeat pie for Christmas. I sat down at the kitchen table to do some collage work in my journal. I also wrote one page. He had the news on as usual which I don't think necessarily is good for my creative juices as honestly what goes on in the world of politics often makes me angry.

Anyway what I did was go through some papers from my daily life and added them to pages that I had already written on, such as adding borders. I also put some ephemera on blank pages. I also added things to the front cover and the end pages of the journal since they were still pretty empty.

I have a little plastic box which held organic salad mix. As I gather papers such as stamps and interesting papers from junk mail I toss them into the box, which I keep in my kitchen. I went through this box last night. Here are some things added to my pages:

Reproduction of vintage Santa Claus from a chocolate wrapper

Gold foil that lined chocolate candy that I received as a Christmas gift

Andes mints foil wrappers, intact and some which I cut with decorative blade Fiskar scissors (this is a family tradition to eat these candies at Christmas time)

Papers which I tested my new wine cork stamps on

Scrap papers from testing rubber and foam stamps on

Cancelled postage stamps from junk mail and Christmas cards

Decorative papers from Christmas card envelopes

Fancy handwriting featuring our family's name and address from Christmas cards and other mail


I also did a scrap paper swap with someone from the Gluebooks chat list and went through that envelope and picked out some papers.

The decorations on the pages are not necessarily tied in to the written content of the pages. The decorations are reflections of the papers that were coming into my life right around the date in which I was writing, so some of them show snowflakes and Christmas themes. Sometimes I found words that expressed the emotion that I was feeling at the time that I was writing.

I still am a bit confused about how to write and glue. It doesn't always work for me to do both in one day. I don't really like gluing from my bed but I do enjoy journaling while in bed at the end of the day.

I keep telling myself what I read that Teesha Moore said about journaling, there are no mistakes in journaling, just do it.

However let's say that I glue down images on one day and then want to use that space to write in, but the images conflict with what I am writing, that doesn't feel right to me. Another issue is that I had used watercolor paints to make the background pages and while doing it I had fun. Most of the pages are very vibrant. However a red and hot orange flame colored page didn't jive with the day we were snowed in due to a huge snowstorm. Do you see my challenge?

I don't like journaling against a blank white page or even into a gluebook which is a white page with collaged elements on top of it. It feels to stark to me.

I am just going to keep plugging away and having fun and maybe someday it will all jive. I have this idea that everyone else feels their journals are perfect and in sync. If someone thinks I am wrong will you please share that with me?

The best thing about last night was that I got into that flow mode which doesn't always happen.

Made Homemade Stamps From Wine Corks and Craft Foam

I was reading a book about various kinds of journals titled, “The Decorated Page: Journals, Scrapbooks & Albums Made Simply Beautiful” by Gwen Diehn in which homemade stamps were mentioned as being made from wine corks. I have heard of them being carved from erasers but not from wine corks!

I immediately put the book down and set off to try it. I save our wine corks in a decorative glass container.

In less then 60 seconds my first wine cork stamp was finished. It was in the shape of a star. I then carved a heart which I botched so that was changed into the letter “V”. I then did made a heart that looked decent. All of that took less than five minutes.

The materials necessary are a craft knife, a cork and a marker. Using a Sharpie marker and freehand, I drew the shape on the cork. I then used the craft knife to carefully cut out the design. I cut along the edge of the design, pressing into the cork. Then I made cuts from the outer edge inward toward the already-cut place, at which point it fell off. I then used the knife to clean up the designs edges.

The hardest part was figuring out how to hold the cork so that if the knife slipped I’d not cut myself.

Obviously the more detailed the design and the more curvy the lines, the harder this would be to cut. I urge you to give it a try.

The stamped design had a wonderful texture due to the cork’s surface texture. It looked a bit scratchy. I also enjoyed the way it looks since it is not factory-perfect and symmetrical.

If the surface is too uneven you can cut it down to be more flat before beginning the carving.

I think I am going to carve my own alphabet stamps from wine corks next!

Someday I would like to own linoleum carving tools so I could make more intricate designs out of erasers.

Homemade Foam Stamps
Oh, and something I did earlier this year for my son’s letterboxing birthday party was to have the children draw designs on craft foam and cut them out with scissors, then to apply them with Gorilla Glue to a piece of pine wood for a homemade foam stamp. This was very easy to do. The foam stamp has an interesting texture to it; the image does not have a flat texture.

Tuesday, December 20, 2005

Making More Marble Art Tile Coasters

I decided to make two sets of marble art tile coasters for gifts. One is a Christmas gift for my husband’s aunt and uncle. The other set is a thank you gift for a friend. I worked on that project each day for the last three days. This time it was NOT without problems!

Set A
I decided to pull images off the web to use to make ice cream themed coasters. The couple who will be receiving this set collects antique ice cream scoops. I pulled the images off the web giving some thought to the copyright status. I didn’t see that the images were copyrighted. I altered the images in Photoshop making them black and white and touching them up. I re-sized them and printed them on my black laser printer. If I owned a color laser printer I would have left the images in color.

(I spent so much time on the downloading and image retouching for this and Set B that it wasn’t until after the tiles were baked that I realized I had forgotten to reverse/flip the image so the text was backwards. Sigh.)

Set B

My friend supplied me with wedding pictures from her wedding, her parents, and her in-laws weddings, and one formal photo of her children. She scanned them and emailed them to me. After touching them up I printed them off. I noticed that sometimes my printer puts a lighter line across the image. I had to print more than one copy to get one without a light line going across the faces.

I also realized this is an old printer with a poor resolution. I wonder how it would work if I emailed images to my local print shop and had them print them off and paid the 10 cent fee? Would the images look better? I should look into this. Also I wonder what he charges for color copies?

Set C
Since I botched Set A I needed to make a new set for the Christmas gift. Last week while in a dollar store I found some large sized hardback books which featured Victorian women and poetry. Actually it was a bit strange as the images were Victorian and from 1905-ish and the other illustrations in the book were art deco—aren’t those two different eras? I also noticed that the illustrator credited on the title page is not the illustrator of the ladies. I think those images were in the public domain. Anyway each book was $1 and I bought three with the intent of cutting them up to use in artwork. I want you to know I restrained myself as there were about a dozen more on the shelf that I could have purchased!

Anyway what I did was cut out color images of the women. The illustrations were large and I decided to use a close-up image of the faces to be on the coaster as that is what would fit. I fashioned a template out of scrap cardboard so I could have a window to view the image through to decide where to cut. I used a metal ruler with a little squiggly edge and tore the paper against that so the edge had a fine torn look to it. The image shape was a square, I didn’t cut out the image.

(Note: after the transfer was complete I realized the image was white ink on paper which means that because I didn’t trim the image right along the face edges, the white color transferred onto the tile. If the image is printed on white paper and the background is not printed with white ink then the paper would have lifted off and the non-face areas would have been the color of the tile. I don’t know if there is a way to know that this will happen ahead of time or not.)

Next Steps
I dusted off each tile. I selected tiles that had the same tints. I was surprised to see some of the tiles had a gray cast to them so I used those as one set.

I tinted acrylic gel medium with burnt sienna acrylic craft paint. I applied this to the tile and let it dry for 30 minutes.

I applied acrylic gel medium to the image and placed it onto the tile. I baked that for 15 minutes at 150 degrees. It cooled for 15 minutes. Note that I made sure the brush strokes were all going in the same direction so they would have a consistent look to them.

I applied water to the surfaces and let it soak it. I began removing the paper by rubbing it. The weather was cold so the heat in the house was on. It was hard to do this step as the paper kept drying out. Unlike the first time I did this, this step had to be repeated over and over, taking hours to get all the paper off. I rubbed so much with my finger that I rubbed my fingerprint off.

I got desperate and tried using fine grit sandpaper which ended up ruining the image. This was a chance I took. Lesson learned.

I did realize that rubbing with a dampened rough dishcloth also works well. The cloth cannot be so rough as to damage the surface.

In the end I turned the coasters upside down on a jelly roll pan and poured water into it. I let it sit for about eight hours. I then rubbed more and all the paper came off. Some of the transfers developed little bubbles under the transfer as a result of doing this.

To dry the very soaked tiles I baked them at 150 degrees for 15 minutes, and then let them sit overnight to dry further.

The images of the women did not work well. This paper was thick and glossy, unlike the copy paper and newspaper I have used with success in the past. No matter what I did there was a film of white over the image, except when wet. I decided to do an experiment. I applied a couple of drops of olive oil to the surface which made the image look ‘normal’ and not foggy. I let that sit for a while then I used a clean paper napkin to wipe off the excess. I let it sit for a while then re-wiped it. I let it sit overnight and saw it still looked good. I wiped it yet again and it seemed dry and fine. I did wonder if the oil would make the acrylic top coat not stick. This was a gamble that I took.

Finishing Them Off
For Set B I painted the edges and a border on the back with black acrylic paint. For Set C I decided to leave the edges showing the burnt sienna wash color.

I applied two coats of acrylic mat medium for the final coat.

I used my big paper cutter to make straight cuts in pieces of wool felt that I had on hand, for the cushion for the bottom. I used tacky glue to apply the squares of felt to the bottom of each tile. I let this dry overnight.

As I said this process was spread over three days. This time the project took many hours of work and was not as fun.

Lessons Learned About Paper

In my experimentation with these marble art tiles I realized that the thinner the paper, the better. The easiest transfers were done from images from the newspaper. I have a lovely transferred color image of the Nutcracker ballerina from a Nutcracker ad from my local newspaper on one coaster.

I wonder what these should price these at if I were to sell them. They took many hours of work, mostly the rubbing off of the paper part, which actually got kind of annoying and not fun after a while. (The issue is that if you don’t get all the paper off, when it dries you see a film of the white paper like a haze over the image. You have to re-wet it and try again.)

I will scan the coasters before giving them away and will post them here.
Sunday, December 18, 2005

Cool Art and Techniques: Tatt22edGoddess_Art

An artist named Sharon (who lives in Australia) who is on one of the Artist Trading Cards chat groups that I am on has her own Yahoo Group! to display her artwork.

In addition to displaying her artwork on this Group!, Sharon also explains the techniques used on her art. She makes ATCs, altered books, altered CDs, gluebooks, and various other altered art. She experiments in various styles. I especially love that she explains her techniques and that is the reason I joined her Group!; there are plenty of places on the web to look at artwork but there are not many that explain the techniques.

You join the list if you want to view her art. If you are 'no mail' setting then you won't get any emails, you can just view the art in her photo albums and read the information in the files section or browse messages online. If you sign up to receive emails you will receive announcements from the artist and the emails explaining her techniques.

This is not a chat list. Members are not able to email the group or chat.

I find her work very inspiring. Sharon is the one who opened my eyes to the fact that something called 'gluebooks' exists.

This is the name of her Yahoo Group!:
Tatt22edGoddess_Art

If you are curious you can join her Group then if you are not interested you can unsubscribe, simple as that.

Check it out!

Thursday, December 15, 2005

Journal Fear, My Journals and Journaling with My Children

I will admit here I am having some fear about journaling. Here is what is going on.

I made a journal out of watercolor paper. I chose to paint the paper before binding it between hard covers. Each page looks so wonderful that I don’t want to cover it up with collaged images of any kind. So far my journal pages have mostly writing on them. Last night I journaled for an hour and was unable to put any images on it. I have lots of ephemera that I like and also ephemera from each day’s ‘events’ but I don’t want to “ruin” the page by covering up the water colored image.

Two nights ago I started a gluebook (aka glue book). A gluebook is a book in which a person does pure collage. No writing, no painting, nothing but glued in papers. I thought perhaps this method would free me. If I was collaging upon plain white paper then I would not want to cover it up. The problem with this type of background is that it is flat and boring. I finished one page and started four others. I then felt compelled to write on the pages to explain or discuss some of the items which appear on the page. I held back from doing because as per the ‘rules’ a gluebook is just a gluebook.

Then I was telling myself who cares what the definitions and rules are. I can do whatever I want. I guess I am in such a beginning point that I worry about doing things ‘right’. The other part of my brain tells me with journaling there is no ‘right’. It can be whatever I want it to be, I am free, I can do what I want.

Using whole images vs. pieces

Here is my other problem. Not only do I not want to show the whole background but I also have a problem with the image. I tend to want to use an entire image even if to do so takes up a ton of room.

I have seen work by artists who use portions of an image. Example: I would include the whole train ticket while someone else may have ripped off one edge of it and used a small piece of it (and that looks great). I am telling myself that if just a portion of the image evokes the same image or feeling or captures the moment or whatever, then that is doing its job and that is all that was required—seeing just a piece of it not the entire thing. However I am having a hard time doing it. I also hesitate to just shred up a piece of ephemera. I am actually afraid to do it. It seems silly for me to write that and admit that. Perhaps to get over this I should make some color copies of things then shred the copies and then once I am comfortable with that, start tearing and cutting up the originals. (I prefer to use original ephemera since I have so much of it all around me.)

So where I am at is I have been journaling in my artist journal and have started a gluebook.

The gluebook I started is in a spiral bound artists sketch journal which I bought 1.5 years ago while at a homeschooling conference. There is a great paper and art supplies vendor who attends this certain conference. The vendor has inexpensively priced paper which they custom bind into various tablets and pads. The company is called Miller Pads and Paper. They have a paper mail order catalog and an internet site. The Miller Pads and Paper sketch pad is 6x9 inches and cost $3.50.

I remember buying pads of watercolor paper (seems to be 140 lb. but I am not sure) for $3. This has not pilled on me and seems fully functional! There were 25 sheets in each pad. You can’t beat that price!

I also had purchased from them some other supplies which we have not used yet. Some of the greatest things were hardbound books with plain white covers and blank pages within that look like children’s picture books. However adults could use these books. I think I paid under $3 for each of these. There were various sizes. I have three in my basement which are 9x12 inches. I don’t know the page count off hand but it is low such as perhaps 32 pages or maybe less.

What my kids are doing as of two nights ago is journaling. My children are aged 5.5 and 8. I gave them their sketchbooks and said they are for gluing in, using stickers in, drawing, and/or writing in. I said they could do whatever they wanted with it. I also had one for me and sat down to go through pages of a magazine and I collaged upon the pages. My children chose different things to do. They ran to get their big art kit, a box of markers, a gel pen set, and the box of stickers. They alternated between creating their own drawings and making collages out of stickers.

Note to self: I need to get more stickers for the kids to play with.

My younger son also asked me to make some drawings for him. He is at that stage where he wants his drawings to be very realistic, as true to life as a photograph. He then refuses to draw if his drawing doesn’t look the way he wants. That first night I caved in and drew him a figure of Obi Wan Kenobi and then a picture of our house.

Last night I sat down to journal and both the kids ran for theirs. My older son did one page of stickers that looks like a crowded collage, then moved on to drawing his favorite thing: trains. He used gel pens. The first was multi-colored. Then he got an idea to do one with only shades of blue. There were about a dozen different shades of blue gel pens in the set (half sparkle ink, half matte).

My younger son wanted me to draw a Sith Lord with lightening coming out of his fingers and electrocuting a Jedi (yuck) and I refused to do any drawing. Instead I traced his hand on the page and he drew lightening coming out of that. Then when he complained of an inability to draw in a realistic manner I suggested he draw shapes instead. I introduced him to oil pastel crayons and I showed him how they could be blended. He did one page of abstract shapes and a second page was more like a border of the page outlined then repeated over and over toward the center. He had a blast blending the oil pastels but didn’t like it when he saw his hands were covered in dark colors. Thank goodness 99% of it washed off with warm water and soap.

Journaling in the evening right before bed has been a very relaxing experience for all three of us. I think we are going to keep this up. It is also nice that I am getting time to journal and not feeling that me doing that is ‘time away from them’. We are all doing it close to each other but working independently.

Wednesday, December 14, 2005

Rubber Stamp Business?

I will share something I was thinking about a few weeks ago.

I was thinking about all the great antique books that I own and how I have purchased some books just because I loved the illustrations. I was thinking about doing various kinds of transfers and how I could use these books as the source image for transfers.

I was on a rubber stamp company’s website and realized I recognized the illustrations from a children’s picture book. I then realized that anyone could use illustrations from old books to make and sell rubber stamps so long as the images were in the public domain and copyright free.

I got to thinking about how with rubber stamping the image can come out much clearer than with transfers. Well packing tape transfers are similar but you can’t work with the image as much and the ink color cannot be changed from the original color. There is also the problem of the packing tape transfer having a high gloss finish.

I then went to Google and searched about how one makes rubber stamps. I found a kit for $299 which is a soup to nuts kit. They said the cost ends up being 20 cents per square inch, if you average in the cost of all the various chemicals and supplies. Once the consumable parts of the starter kit are all used up, you can buy more chemicals and the consumable products from the same company. The process was basically two steps: take the image and make an etching and then make the rubber part of the stamp. The way they described the process seemed very easy and manageable for a person like me to be able to do.

I also saw some ads in a rubber stamping magazine advertising that if you send your etching to them they will do the rubber stamp making part. I believe the ad said the cost was $5.85 per 8x11 inch sheet of unmounted rubber stamps. This is MUCH less than 20 cents per square inch cost.

I saw another ad for a rubber stamp making vendor, who makes stamps from a person’s own designs. This ad was saying they are confidential and will keep your images secret. I then began wondering if there was some kind of underground problem whereby people send in their images to a company to have rubber stamps made then the company turns around and makes more and sells them. I would never have thought of that but it would not surprise me if that was the case. All kinds of unethical things like that go on in America.

I was then thinking that since I am so desperate for money perhaps I should go into the unmounted rubber stamp business from my home and run a web catalog. I could use images from antique books that I own and I’d have to verify the copyrights have expired.

I talked with my husband about this but he was leery. Frankly I don’t know if there is money to be made in this or “if I build it, they will come”.

If the start up costs were low and I use my free time to do this, maybe it would work.

I also wondered if I’d have to go on the rubber stamp convention circuit to promote my products.

Who knows, maybe someday I’d be on the Carol Duvall show?

Back to reality.

The reason I was thinking about this in the first place was to have rubber stamps to use for my own artwork that were designs that appealed to me.

After my husband gets a job and we can afford a $299 purchase on a hobby thing, I’ll buy that kit and check it out.

Another thing I could do is join a chat list for rubber stampers and see if anyone else has tried this kit or tried designing their own rubber stamps.

Monday, December 12, 2005

About Big Al Taplet

In 1998 I met Big Al Taplet. Big Al is a folk artist whose ‘real job’ was a shoe shine man. He is a self-taught artist who would paint primarily signs. He needed a sign for his show shine shop and he painted one with not only words, but with illustration(s). A passerby asked if he could buy the sign and he sold it for $10. Big Al reportedly was surprised anyone would want to buy his sign. The next sign sold for $15. Ever since, Big Al has been making folk art and selling it.

I learned via the web that originally Big Al owned a small shoe shine shop in New Orleans. He used to sell his artwork from the store front. At some point he stopped having a shop for shoe shining and began selling work on the sidewalks around Jackson Square.

His artwork was sold outside of Jackson Square in New Orleans, when I met him. He’d hang his signs on the iron fence. I was drawn to many of his pieces. Some that I would have loved to buy were priced at $85. I don’t remember being priced any lower than that. Actually the prices were not on the pieces, you had to ask him what the prices were. There were some great signs that I thought would be perfect for hanging in my kitchen (because I couldn’t imagine hanging signs featuring breakfast foods anywhere else but in the kitchen).

Big Al was fun to talk to. We chatted for about ten minutes as I admired his art. He tried talking me into buying some of his artwork. He laughed a lot and was quite a character. Big Al’s art is not my husband’s cup of tea. I decided not to buy any as I thought my husband would complain if I hung it up in our home, and frankly, that he’d freak out if he found out I’d paid $85 for it. Another thing that kept me from buying it that day was I didn’t have enough cash on me at the time. I regretted this decision as early as that night, because his art stayed in my mind and I had this great image of the art hanging in my kitchen. When I went back the next day he was not there.

When I visited New Orleans again in 1999, 2001 and 2002, I was hoping to buy some of Big Al’s work. I was ready at that point to buy it despite the complaints that I’d get from my husband. I also knew my family and my husband’s family would laugh at me and put this on their mental list of why they think I am weird. Anyway when I was in New Orleans on these trips I never saw Big Al again. Frankly I was wondering if he had passed away or was no longer making art.

I also wondered about Big Al post-Hurricane Katrina. I checked online today and saw that he is indeed alive and well and still is making ‘outsider art’. Here is a site which states he is living in Texas currently.

Big Al’s work often contains misspellings. A lot of his paintings feature shoe shining themes. He also makes a lot of art with the theme of no shoes, no service and also no money, no eggs (or other breakfast foods).

Here are some sites if you would like to see his artwork, photos of the artist and articles about him.

Article One

Article Two

Article Three

Article Four

Article Five

Article Six

Here is an article about Big Al in Houston after Hurricane Katrina hit.

This is a great long article about Big Al and Hurricane Katrina, and about him now that he is living in Houston

More on My Experience with Outsider Art in New Orleans
Twice while in New Orleans I’d visit a folk art gallery/shop. The work in there was amazing. The store was overstuffed. I could barely walk through the shop. Art was stacked on the floor, on the walls, and on every horizontal surface. I could have spent hours in there. Too bad at the time my son was a toddler and was in a stroller which was near impossible to navigate while in there. I saw many interesting pieces of art but again didn’t buy any as my husband would have detested them all and been angry that I had spent money on them.

Thursday, December 08, 2005

Puzzled About Collage Sheets as a Business Venture

I am still surprised and puzzled about ‘collage sheets’. Let me get this right: someone purchases antique photos, scans them and sells copies of them as ‘collage sheets’ at $4-5 a pop? Do people really buy these?? Are these companies really making money?

Here is one online seller of collage sheets of vintage photographs, called B-Muse.

I once emailed the owner of one of these businesses after she placed an ad on an ATC chat list which I am on. I politely asked her if she really makes money on this type of business. She did not answer my questions. I was polite and was hoping my question would not offend her. It was an honest business question, I thought.

Over the years I have purchased antique photos at flea markets when I saw some. I always have been drawn to them. I wonder what the stories are behind the people captured on film. Some of the people and children are so interesting looking. I usually pay $1 per photo for them. I don’t have many, perhaps 20 total. My husband always thought I was nuts to buy them so I would limit my spending. The best source of them for me is the Wellfleet Drive-in Movie Theatre Flea Market in Wellfleet, Cape Cod, Massachusetts.

My grandmother also has a collection of family photos which I could copy and sell, if it were a worthwhile endeavor.

I have always been drawn to old skeleton keys, which also usually sell for $1. This is another thing that my husband thinks I am strange for buying. I only have about 5 or 6 of them, but I digress.

Anyway I would really like to know if there is money making potential in selling these collage sheets. This is what I worry about:
The cost of running a website
How much time is invested in the business vs. profits actually made?
Can a profit actually be made?

If money can be made this way then all one needs to do is buy some of the photograph lot auctions which are on eBay. “Lots” of photos are going for less than $1 each.

A question I’d have is what type of printer would be high quality enough to use to print off these sheets. Could I use my home printer, would I have to buy a new one or would I pay a local copy shop to print them off for me?

Perhaps the solution to our lack of income and unemployment is me going into a business of this sort? Could it be that easy?

I spoke to my husband about this idea. He just said, “Be the seller, not the buyer”. I think he was worried I was going to go on a spending spree to purchase collage sheets. So far, I haven’t spent a dime on them, so he can rest easy.

By the way I am miffed about the copies of old photos or documents, not collage sheets of an artist’s original artwork (which seems more legitimate to me). Here is an example of an artist who sells her original artwork on collage sheets: Teesha Moore.

Finished First Art Journal Last Night

Last night I finished off making my first art journal. What I mean by that is I bound the papers into a hardcover binding. The journal is now ready to use. It is a 72 page journal with already-painted backgrounds of watercolor paint on watercolor paper. I ended up blending two different sets of directions on how to make a journal. I also didn’t have waxed upholstery thread so I improvised with waxed dental floss that we had on hand (!). It works just fine so far but it does seem a little thin. The next time I am near a fabric store I will purchase a spool of the right kind of thread.

Last night I made my first entry and also began decorating the cover and inside of the cover. I decided to leave the front cover up for ongoing collaging, as well as the inside of the front cover.

I was so tired and really wanted to get to bed so I took some magazines and a pair of scissors to bed with me with the intent of finding words and images to put into the journal. However, right then my younger son vomited and so then the plans for the night were changed.

My older son loves the journal and is asking that I make one for him. I think I will make one with regular paper (not watercolor paper). I have some large sized 120 lb. paper here intended for children’s drawings which would be sturdy enough for a book like this. I think that a journal such as this for an eight year old is a great idea, because the pressure is not on writing with words, composition, and handwriting (all of which are still difficult for a child of that age). The focus can be on adding things in, in a scrapbook or collage sort of way. Perhaps this can also be a place to journal and share feelings and thoughts? If it only ends up being a visual art type book that will be fine.

Now my husband is asking that I make such a book as a photo album for his father, of the cruise trip that my father-in-law took our entire family on earlier this year. I will have to think about that. I need to figure out what pro’s a handmade book has over purchasing a photo album. For example I wouldn’t want to watercolor the pages and put all that effort into it if most of the page will be covered with photos. If I do this the photos will look like regular photos, they won’t be cropped and ‘scrapbooked’. Sorry, but I still don’t like at all, the look of the typical ‘scrapbook’ fad albums.

I also was thinking of making some small books as gifts for friends. I can’t remember the name but there is a name for little books in which people write their favorite quotes or poems. As one is found, it is added to the book. It becomes a custom built inspiration book!

I will take some photos and will post them one of these days.

I plan to try and find time each day to make entries in my journal! I am so excited!

Rubber Stamping—Stamping Madness

Okay here is a sign that a person has stamping madness: everything they see is considered a possible item to use for stamping.

If my husband reads this he may have me committed. Okay, here I go.

The other day I finished off the last egg from the carton. This carton was Styrofoam. I realized the crunched up bottoms might make an interesting texture if I stamp with them. I saved this.

I finished a cartridge of Mentadent toothpaste last night. The bottom is an oval with two circles side by side inside of it. The cartridge is a hard plastic (I think #5) which my town does not recycle. I was wondering how this might look if I stamped with it. This thing I did throw away.

I saved the foil tops that come inside of powdered drink containers: Carnation Instant Breakfast, Ovaltine, Ghiradelli Hot Cocoa mix and Pacific Chai Tea mix. These are round and have little raised dots. I tried stamping with them and they make an interesting dot pattern. I found that stamping with acrylic paint worked better than rubber stamp ink.

I saved an onion bag the other day.

The possibilities are endless.

Wednesday, December 07, 2005

Serendipity: Foreign Language Books Found, Free

I have been looking at library sales for books in foreign languages, especially dictionaries, to use while making art. Back when I didn’t want them it seemed I saw them at every library sale.

The other day I was at a public library. In the lobby was a lot of free literature and also there was a box of free books. There were eight in the box.

One was a French/English dictionary. It is an old book with nice paper, a bit of foxing that gives it character. The spine is broken and pages are falling out. I won’t feel at all bad about using some pages to make art.

I also found a book that teaches Italian which is primarily lists of words, which looks very interesting for using for art. Actually this looks so interesting I may want to keep it to use it if my children or I ever want to learn to speak Italian.

Both books smell badly of cigarette smoke. I wonder if that is why the library is not keeping them for their annual book sale?

I took only those two books. I wanted to leave some for others to take.

Tuesday, December 06, 2005

Working on My First Art Journal

My Progress:

Sunday: Painted one side of 23 sheets of watercolor paper. This is some cheap brand that I had on hand and paid $3 for the pad of 23 sheets. It seems to be working fine, not pilling, etc.

Monday: Painted other side of 23 sheets of watercolor paper.

Tuesday:
a. Selected my favorite 18 pages to use for interior pages and arranged them in an order that is not offensive to the eye (colors not clashing).
b. Folded papers and ironed to make sure they were flat and creased well.
c. Decided to make three signatures of six pages each.
d. Printed out directions from internet about how to make a journal from scratch. Printed the directions I used last May to make 20 small journals as party favors for my son’s Letterboxing Birthday Party. Also printed out the directions on www.teeshamoore.com.
e. Read through both sets of directions and realized I am making a different size than these specify so now I have to use ‘math for daily living’ to figure out sizes for the cover board, paper for cover, end papers, etc.

Wish me luck.

Art Advent Calendar: Free Art Gifts for Us

This site was created by a person on one of my ATC chat lists. She shares one cyber gift of art with us daily through her cyber advent calendar. Each day a new PDF file is available for us to download and use in any way that we desire.

This is a creative idea. I am grateful when people make and share things like this with strangers, connecting together in cyberspace!

Monday, December 05, 2005

My First Two Marble Art Tiles


These are my fist two marble art tiles, which I blogged about recently (read blog entry here).

Technical note: Blogger was not uploading the other image. There was no error message, it said it was 'done' but there was no image. I read in the help section that if the image is too large it can't be uploaded. I downsized the dpi of the scan and then it worked. I wish Blogger would have an error message explaining that so I'd/we'd understand the cause of the problem without guesswork!

Dover 50% Clearance Sale

Dover's online store has new items in their Clearance Center--50% off. I see lots of items here for making art. There are art history books and fine art postcards. There are stickers of Victorian babies and children. There are clip art books and books of images in the public domain. Their gift wraps can be used as collage elements or for decoupage.

I have ordered from Dover online before and the customer service was great and the items were received quickly and without error.

Happy Shopping!

Sunday, December 04, 2005

Huge Art Day Today

I have been very busy lately and unable to make art. I have been helping my mother by attending doctor’s appointments for her Breast Cancer. I also spent a day with her when she had her surgery.

I have found what appeals to me most while sitting in waiting rooms for hours and while faced with such a depressing thought as my mother having Cancer is reading about making art. I hope to write some reviews and summaries of the books and magazines which I have been reading soon.

Last night was the coldest night of this season so the heat was really going in our house. As a result, I had one of those horrible dreams where my mouth and throat are all dry and no matter how much I drink, I cannot quench the thirst. I woke up to realize this was just a dream but did find myself completely dried out. It was five in the morning and I was well rested and unable to get back to sleep. So I got up to make art.

I began by working on an ATC for a Found Photos swap which has been difficult to make. I worked with it a little but still felt discouraged. I tried working on a swap called “Scavenger Hunt” but still can’t find images that are required for this. I am considering backing out as this is not fun anymore.

I then decided to begin altering the thrift shop finds. I put a coat of Golden White Gesso on these items:
Seven Christmas ornaments ($2)
Lid of metal heart shaped container (25 cents)
French Flower Vase ($2)
Wooden box with lid (25 cents from a thrift shop)

(I took 'before' pictures of these items which I will share with you another time, if Blogger will let me upload them.)

After that dried I lightly sanded each then applied a second coat.

Everyone was still asleep so I decided to make the beginnings of a watercolor paper journal. I took out a watercolor paper pad which I bought last year for $3. I don’t know the weight of it, but it is good enough to not pill or come apart when I paint on it. The pad had 23 pages in it.

This is how I like to work with the watercolor paints. I dampened the surface of the paper with water. It is not soaking wet, it is just damp. I then squeeze tubes of watercolor paint onto a palette. I think this is a cheap brand of paint; I bought it in an overstock store for $1.95 for 12 little tubes of paint. I am not disappointed by it so far. Hey, this is all I can afford right now so this is what I am using! I then dampened an old shaving brush and dipped it into the paint (undiluted). I brush this across the paper. I add in a second color and sometimes also white. If the color is too dense I dip the brush into the clear water and then paint on the paper with it. I make sure the entire paper is covered.

Today I worked primarily with shades of pink (made with red and white paint), shades of red with a touch of orange/yellow mixed in, and some blues with white paint mixed in. The green page I made was not a pretty color, it looked a bit muddy (perhaps this is a consquence of using cheap paints?). I made two purple pages which came out quite dark and frankly I don't know if they can be written upon (maybe I should try bleaching them?).

The pages dried very quickly due to the house being so dry because the heat is cranking due to the weather being in the 20s today.

Oh, I forgot to mention that when I woke up there was snow on the ground and it was falling the entire time. This meant that church was out of the question. Also the roads were not plowed and that meant our brunch plans at our friend’s house was also cancelled. So I was relaxed enough to play at art and not feel guilty. It was great to think the whole day was committment-free all of a sudden, what a luxury.

When the watercolor paper dried it was curled up at the edges I was not going to give up, though. I decided to iron the very-dry papers. It worked. On an ATC chat list which I am on, when someone asked about this problem/dilemma, they were told to buy more expensive, heavier pound paper.

Anyway I hope to make an artists journal for myself and also I’d like to give one to a friend who keeps a (regular) journal. Perhaps the painted pages will inspire her more than her journals grid-paper.

An open question is what do I do about the backs of the pages? Can these be painted upon also? I will experiment with this. However if you have the answer I'd love to hear it.

My children then woke up and they wanted to make paper snowflakes. This was inspired by last week’s Cub Scout meeting in which my Co-Leader had the Scouts making snowflakes to give to residents of a nursing home at which we will be singing Christmas Carols and other holiday songs. My older son insisted on doing things his way so all of his snowflakes came out square. I took out some square tissue paper we own and we made more with the colored tissue paper. Later I ironed some of these so that they would lie flat. My older son refused to allow me to iron his as he said he preferred the look of the folds being visible. (I live with children with strong opinions.)

I also worked on painting the French Flower Vase. After the two coats of Golden white Gesso I applied one coat of burnt sienna colored acrylic craft paint. In some areas where the brush strokes were I could see the white background. I decided I'd like it to be a more muted color, so for the next coat I applied an acrylic glaze to which I had added a cream colored acrylic paint as a tint. When this was dry, it looked too white and bright to me, it didn't come out the way that I had thought it would. I decided to apply a coat of bronze metallic acrylic paint as a wash (the paint was diluted with an equal part of water). This effect worked great. In the areas that looked too white and bright I added plain paint and worked it in until it looked good to me.

I painted the exterior and the handles and the top rim. I left the interior the way it was, which is painted a solid cream color.

My original intention was to collage on top of this paint. Frankly, it looks great the way it is. I will put this to the side for a few days while I ponder the next step (if there is one). I also will ponder what kind of images I would want to collage onto this and also what will I use this for? (And I do want the other three which are still for sale at the thrift shop for $2 each.)

As I write this it is approaching 6 p.m. and dinner is over and already cleaned up. I might have more time for making art before we go to bed.

Thrift Shop Finds: For Altering

My brother, parents, and grandmother have been donating a lot of things to a certain thrift shop in their hometown in the last year. I helped my grandmother do a decluttering this summer and fall and we donated at least 20 large bags or boxes of items. (My brother did the drop-off’s.) I had never visited the shop until two days ago.

The shop is not open often and never past 4 p.m., and it is 35 minutes away from me (without traffic), so I had not been there. However I did get to visit with a goal of finding things to alter, two days ago.

I found a French Flower Vase (actually there were four but I only bought one). I decided to try to alter it and if it worked, I’d go back and get the other three (or send relatives to buy it). I am now kicking myself because I paid $2 and I see similar ones for over $55. These were all in ‘like new’ condition. Here is a picture of one which looks very similar. However the design on the exterior of mine was a different and better looking (to me) muted rose pattern.

I bought a little cabinet with a door. This appears to be melamine but maybe it is real wood. It has a nice nautical scene on the inlaid panel on the door. I paid $5 for it.

I bought a wooden tray intended for cutlery. This is quite sturdy and nice and cost $3.

I bought a tiny heart shaped tin with a vanilla scented candle in it for 25 cents. Today I am burning the candle out and will alter it to be a little container.

I bought a bag of Christmas ornaments; there were eight in all, for $2 total. Upon further inspection of them (they were in a sealed bag), I realized these are Styrofoam bases coated with decorative papers and sealed with what looks like Mod Podge. I say it looks like Mod Podge that because one was quite yellowed and cracked in two spots, so I threw it away. (People keep telling me that Mod Podge yellows and can crack over time.) There were four circles/balls and four heart shaped (three dimensional).

The goal of buying things at inexpensive prices to alter is threefold: I can’t afford to buy new expensive things to alter; I would not want to spend the money that way even if I did have it, and if I botch the job then I am not out very much money. Oh, and this is yet another way to “reuse and recycle”. Lastly, the money I spent on these goes to a charity, so they benefit from my purchase as well.

Subscribed to Art and Life & Wish List

With money that my Grandmother is giving me for Christmas I just subscribed to Art and Life magazine. This is a magazine published by Teesha Moore. This is a new magazine.

Issue #1 was sold out. I saw auctions for them selling on eBay for over $20 per issue.

However today, on Teeshamoore.com, I see that they have reprinted additional copies of Issue #1 and they are selling for $10 for that single issue (however shipping is $7---OUCH!).

My 5.5 year old son just asked me what I would like for Christmas. He said that he would write a letter to Santa on my behalf. I asked for Issues #1-4 of Play magazine.

However after I said that I realized that now that I could have Issue #1 of Art and Life, I want that also.

I guess the letter should be amended.

However I reminded my son that Santa only buys presents for children, so this will fall on deaf ears. He got a little emotional and said he wants me to have some things that I want for Christmas, that not just he and his brother receive gifts.

How sweet!